
Page 49 - 15 Dangerously Mad Projects for the Evil Genius
P. 49
30 15 Dangerously Mad Projects for the Evil Genius
Before you fix anything in place, hold the pipes
where they leave the leaf blower, turn the leaf
blower on, and find the position for the pipes
where you get the strongest blast of air through
them.
Step 2. Fit the Barrels
The pipes are held in place by blocks of expanded
polystyrene packing material (Figure 3-7). These
are slightly larger than the gap they are filling and
wedge the pipes firmly in place. They do not
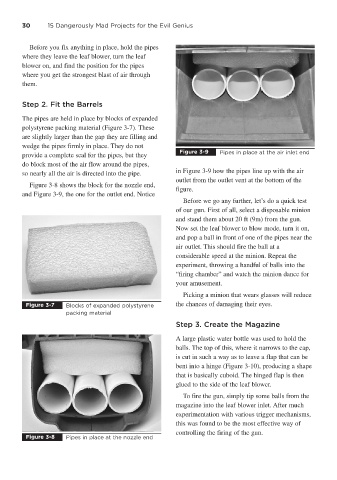
Figure 3-9 Pipes in place at the air inlet end
provide a complete seal for the pipes, but they
do block most of the air flow around the pipes,
so nearly all the air is directed into the pipe. in Figure 3-9 how the pipes line up with the air
outlet from the outlet vent at the bottom of the
Figure 3-8 shows the block for the nozzle end,
figure.
and Figure 3-9, the one for the outlet end. Notice
Before we go any further, let’s do a quick test
of our gun. First of all, select a disposable minion
and stand them about 20 ft (9m) from the gun.
Now set the leaf blower to blow mode, turn it on,
and pop a ball in front of one of the pipes near the
air outlet. This should fire the ball at a
considerable speed at the minion. Repeat the
experiment, throwing a handful of balls into the
“firing chamber” and watch the minion dance for
your amusement.
Picking a minion that wears glasses will reduce
Figure 3-7 Blocks of expanded polystyrene the chances of damaging their eyes.
packing material
Step 3. Create the Magazine
A large plastic water bottle was used to hold the
balls. The top of this, where it narrows to the cap,
is cut in such a way as to leave a flap that can be
bent into a hinge (Figure 3-10), producing a shape
that is basically cuboid. The hinged flap is then
glued to the side of the leaf blower.
To fire the gun, simply tip some balls from the
magazine into the leaf blower inlet. After much
experimentation with various trigger mechanisms,
this was found to be the most effective way of
controlling the firing of the gun.
Figure 3-8 Pipes in place at the nozzle end