
Page 166 -
P. 166
243_masterpieces_03.qxd 4/18/03 7:02 PM Page 138
138 Masterpiece 3 • The LEGO Turning Machine
Final Step 3
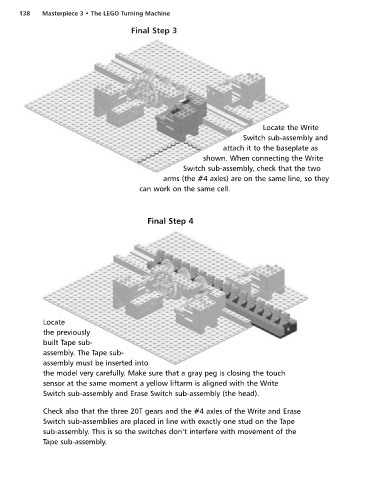
Locate the Write
Switch sub-assembly and
attach it to the baseplate as
shown. When connecting the Write
Switch sub-assembly, check that the two
arms (the #4 axles) are on the same line, so they
can work on the same cell.
Final Step 4
Locate
the previously
built Tape sub-
assembly. The Tape sub-
assembly must be inserted into
the model very carefully. Make sure that a gray peg is closing the touch
sensor at the same moment a yellow liftarm is aligned with the Write
Switch sub-assembly and Erase Switch sub-assembly (the head).
Check also that the three 20T gears and the #4 axles of the Write and Erase
Switch sub-assemblies are placed in line with exactly one stud on the Tape
sub-assembly. This is so the switches don’t interfere with movement of the
Tape sub-assembly.