
Page 146 - Making things move_ DIY mechanisms for inventors, hobbyists, and artists
P. 146
126 Making Things Move
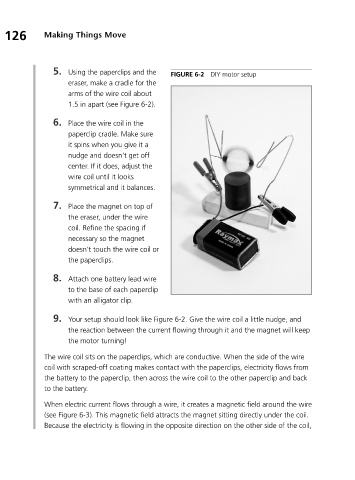
5. Using the paperclips and the FIGURE 6-2 DIY motor setup
eraser, make a cradle for the
arms of the wire coil about
1.5 in apart (see Figure 6-2).
6. Place the wire coil in the
paperclip cradle. Make sure
it spins when you give it a
nudge and doesn’t get off
center. If it does, adjust the
wire coil until it looks
symmetrical and it balances.
7. Place the magnet on top of
the eraser, under the wire
coil. Refine the spacing if
necessary so the magnet
doesn’t touch the wire coil or
the paperclips.
8. Attach one battery lead wire
to the base of each paperclip
with an alligator clip.
9. Your setup should look like Figure 6-2. Give the wire coil a little nudge, and
the reaction between the current flowing through it and the magnet will keep
the motor turning!
The wire coil sits on the paperclips, which are conductive. When the side of the wire
coil with scraped-off coating makes contact with the paperclips, electricity flows from
the battery to the paperclip, then across the wire coil to the other paperclip and back
to the battery.
When electric current flows through a wire, it creates a magnetic field around the wire
(see Figure 6-3). This magnetic field attracts the magnet sitting directly under the coil.
Because the electricity is flowing in the opposite direction on the other side of the coil,