
Page 160 - Build Your Own Quadcopter_ Power Up Your Designs with the Parallax Elev-8
P. 160
Chapter 6: Radio-Controlled Systems and Telemetr y 139
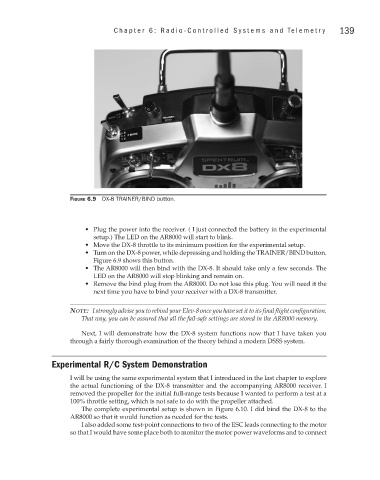
Figure 6.9 DX-8 TRAINER/BIND button.
• Plug the power into the receiver. ( I just connected the battery in the experimental
setup.) The LED on the AR8000 will start to blink.
• Move the DX-8 throttle to its minimum position for the experimental setup.
• Turn on the DX-8 power, while depressing and holding the TRAINER/BIND button.
Figure 6.9 shows this button.
• The AR8000 will then bind with the DX-8. It should take only a few seconds. The
LED on the AR8000 will stop blinking and remain on.
• Remove the bind plug from the AR8000. Do not lose this plug. You will need it the
next time you have to bind your receiver with a DX-8 transmitter.
Note: I strongly advise you to rebind your Elev-8 once you have set it to its final flight configuration.
That way, you can be assured that all the fail-safe settings are stored in the AR8000 memory.
Next, I will demonstrate how the DX-8 system functions now that I have taken you
through a fairly thorough examination of the theory behind a modern DSSS system.
Experimental R/C System Demonstration
I will be using the same experimental system that I introduced in the last chapter to explore
the actual functioning of the DX-8 transmitter and the accompanying AR8000 receiver. I
removed the propeller for the initial full-range tests because I wanted to perform a test at a
100% throttle setting, which is not safe to do with the propeller attached.
The complete experimental setup is shown in Figure 6.10. I did bind the DX-8 to the
AR8000 so that it would function as needed for the tests.
I also added some test-point connections to two of the ESC leads connecting to the motor
so that I would have some place both to monitor the motor power waveforms and to connect