
Page 52 - Build a Remote Controlled Robot
P. 52
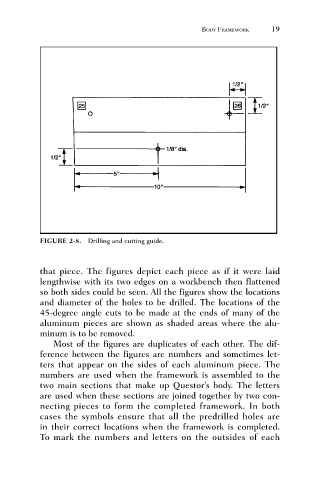
FIGURE 2-8. Drilling and cutting guide.    BODY FRAMEWORK     19


                              that piece. The figures depict each piece as if it were laid
                              lengthwise with its two edges on a workbench then flattened
                              so both sides could be seen. All the figures show the locations
                              and diameter of the holes to be drilled. The locations of the
                              45-degree angle cuts to be made at the ends of many of the
                              aluminum pieces are shown as shaded areas where the alu-
                              minum is to be removed.
                                 Most of the figures are duplicates of each other. The dif-
                              ference between the figures are numbers and sometimes let-
                              ters that appear on the sides of each aluminum piece. The
                              numbers are used when the framework is assembled to the
                              two main sections that make up Questor’s body. The letters
                              are used when these sections are joined together by two con-
                              necting pieces to form the completed framework. In both
                              cases the symbols ensure that all the predrilled holes are
                              in their correct locations when the framework is completed.
                              To mark the numbers and letters on the outsides of each