
Page 22 - Enhancing CAD Drawings with Photoshop
P. 22
4386.book Page 5 Monday, November 15, 2004 3:27 PM
COLOR VS. NUMBER 5
Figure 1.4
The Options bar when
the Line tool is selected
5. Before you draw a line, you need to select the relevant options on the Options bar:
◆ Set the width to one pixel by typing 1 px in the Width text box if it is not already set to 1
pixel.
◆ Make sure the blending mode is set to Normal.
◆ Also leave the opacity at 100%.
◆ Finally, make sure the Anti-aliased check box is unchecked.
6. Draw a line by dragging and releasing the mouse in the left side of the document window.
7. Hold down the Shift key and draw more lines. Notice that while Shift is held, you can only
draw lines that are horizontal, vertical, or on a 45-degree angle.
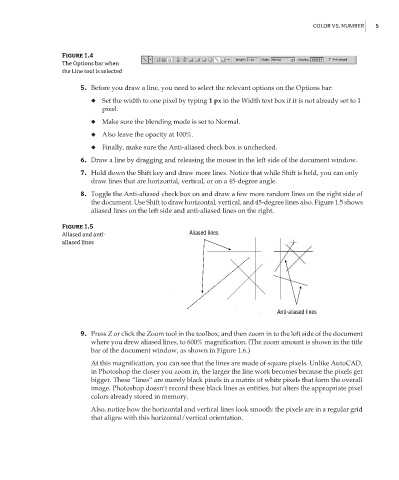
8. Toggle the Anti-aliased check box on and draw a few more random lines on the right side of
the document. Use Shift to draw horizontal, vertical, and 45-degree lines also. Figure 1.5 shows
aliased lines on the left side and anti-aliased lines on the right.
Figure 1.5
Aliased and anti- Aliased lines
aliased lines
Anti-aliased lines
9. Press Z or click the Zoom tool in the toolbox, and then zoom in to the left side of the document
where you drew aliased lines, to 600% magnification. (The zoom amount is shown in the title
bar of the document window, as shown in Figure 1.6.)
At this magnification, you can see that the lines are made of square pixels. Unlike AutoCAD,
in Photoshop the closer you zoom in, the larger the line work becomes because the pixels get
bigger. These “lines” are merely black pixels in a matrix of white pixels that form the overall
image. Photoshop doesn’t record these black lines as entities, but alters the appropriate pixel
colors already stored in memory.
Also, notice how the horizontal and vertical lines look smooth: the pixels are in a regular grid
that aligns with this horizontal/vertical orientation.