
Page 272 - Excel Progamming Weekend Crash Course
P. 272
n540629 ch19.qxd 9/2/03 9:35 AM Page 247
Session 19 — Creating Custom Dialog Boxes with User Forms 247
A Simple User Form Example
The user form presented in this section is intended to illustrate some of the basic proce-
dures involved in creating and using forms in your Excel applications. It does not perform
any useful tasks; real-world examples of useful forms are presented in Session 21.
The form contains three controls:
A text box in which the user can enter information to be returned to the program.
A button that moves the form to the top left of the screen.
A button that closes the form.
The first part of creating this demonstration is to design the form.
1. In the VBA Editor, select Insert ➪ User Form to add a new user form to the current
project.
2. In the Property window, change the form’s Name property to TestForm and its
Caption property to User Form Demo.
3. Click the form to activate it. Then in the toolbox, click the Command Button icon.
4. Place the button at the desired location by dragging on the form.
5. In the Property window, change the button’s Name property to cmdMove and its
Caption property to Move.
6. Click the form again, and add another Command Button. Change its Name property
to cmdClose and its Caption property to Close.
7. Return to the form again, and add a TextBox control to the form. Leave this control’s
properties at their default values.
8. Click the Save button on the toolbar to save the project.
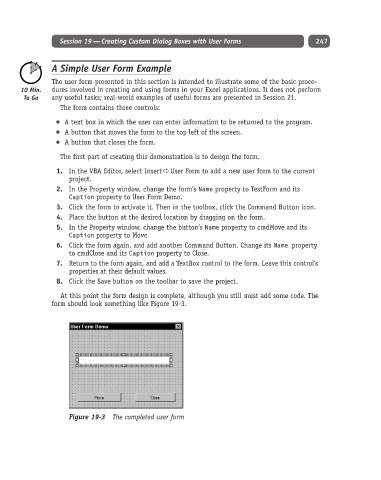
At this point the form design is complete, although you still must add some code. The
form should look something like Figure 19-3.
Figure 19-3 The completed user form