Page 192 - Machinery Component Maintenance
P. 192
174   Machinery Component Maintenance and Repair

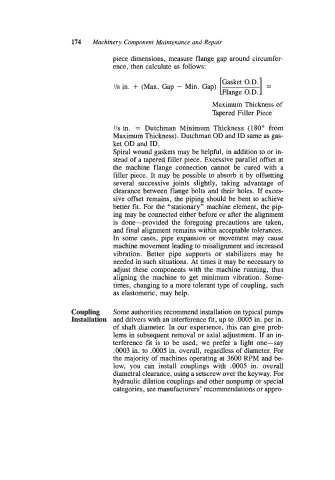
                                   piece dimensions,  measure flange gap around circumfer-
                                   ence, then calculate as follows:
                                                                   I Flange O.D. I=
                                                                    Gasket 0. D .
                                   l/8  in. + (Max. Gap  - Min. Gap)

                                                                 Maximum Thickness of
                                                                 Tapered Filler Piece

                                   1/8  in.  =  Dutchman  Minimum  Thickness  (180’  from
                                   Maximum Thickness). Dutchman OD and ID same as gas-
                                   ket OD and ID.
                                   Spiral wound gaskets may be helpful, in addition to or in-
                                   stead of  a tapered filler piece. Excessive parallel offset at
                                   the  machine  flange  connection  cannot  be  cured  with  a
                                   filler piece.  It may be possible to absorb it by  offsetting
                                   several  successive joints  slightly,  taking  advantage  of
                                   clearance between  flange bolts and their holes.  If exces-
                                   sive offset remains,  the piping should be bent to achieve
                                   better fit. For the “stationary”  machine element, the pip-
                                   ing may be connected either before or after the alignment
                                   is  done-provided  the  foregoing  precautions  are  taken,
                                   and final alignment remains within acceptable tolerances.
                                   In  some cases,  pipe  expansion  or movement  may  cause
                                   machine movement leading to misalignment and increased
                                   vibration.  Better  pipe  supports  or  stabilizers  may  be
                                   needed in such situations. At times it may be necessary to
                                   adjust these  components with the  machine running,  thus
                                   aligning  the  machine  to  get  minimum  vibration.  Some-
                                   times, changing to a more tolerant type of coupling,  such
                                   as elastomeric,  may help.


                       Coupling    Some authorities recommend installation on typical pumps
                       Installation  and drivers with an interference fit, up to .OW5 in. per in.
                                   of  shaft diameter.  In our experience, this can give prob-
                                   lems in subsequent removal or axial adjustment. If an in-
                                   terference  fit  is  to  be  used,  we  prefer  a  light  one-say
                                   .OOO3 in. to .OOO5  in. overall, regardless of diameter. For
                                   the majority of machines operating at 3600 RPM and be-
                                   low,  you  can  install  couplings  with  .0005  in.  overall
                                   diametral clearance, using a setscrew over the keyway. For
                                   hydraulic dilation couplings and other nonpump or special
                                   categories, see manufacturers’ recommendations or appro-

