
Page 169 - Making things move_ DIY mechanisms for inventors, hobbyists, and artists
P. 169
148 Making Things Move
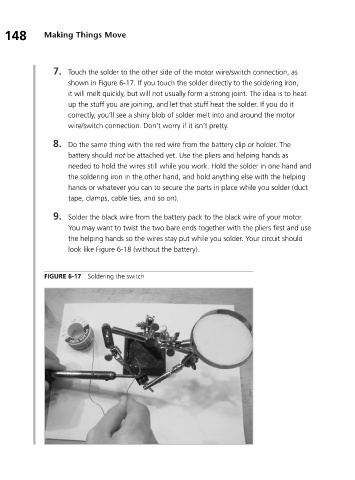
7. Touch the solder to the other side of the motor wire/switch connection, as
shown in Figure 6-17. If you touch the solder directly to the soldering iron,
it will melt quickly, but will not usually form a strong joint. The idea is to heat
up the stuff you are joining, and let that stuff heat the solder. If you do it
correctly, you’ll see a shiny blob of solder melt into and around the motor
wire/switch connection. Don’t worry if it isn’t pretty.
8. Do the same thing with the red wire from the battery clip or holder. The
battery should not be attached yet. Use the pliers and helping hands as
needed to hold the wires still while you work. Hold the solder in one hand and
the soldering iron in the other hand, and hold anything else with the helping
hands or whatever you can to secure the parts in place while you solder (duct
tape, clamps, cable ties, and so on).
9. Solder the black wire from the battery pack to the black wire of your motor.
You may want to twist the two bare ends together with the pliers first and use
the helping hands so the wires stay put while you solder. Your circuit should
look like Figure 6-18 (without the battery).
FIGURE 6-17 Soldering the switch