
Page 173 - Making things move_ DIY mechanisms for inventors, hobbyists, and artists
P. 173
152 Making Things Move
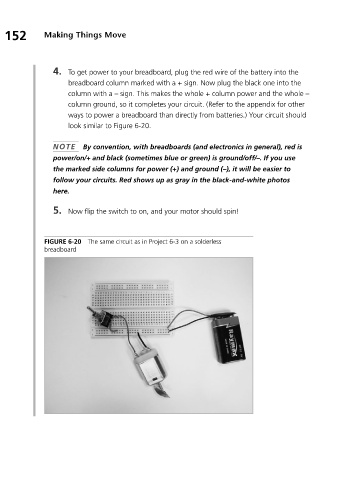
4. To get power to your breadboard, plug the red wire of the battery into the
breadboard column marked with a + sign. Now plug the black one into the
column with a – sign. This makes the whole + column power and the whole –
column ground, so it completes your circuit. (Refer to the appendix for other
ways to power a breadboard than directly from batteries.) Your circuit should
look similar to Figure 6-20.
NOTE By convention, with breadboards (and electronics in general), red is
power/on/+ and black (sometimes blue or green) is ground/off/–. If you use
the marked side columns for power (+) and ground (–), it will be easier to
follow your circuits. Red shows up as gray in the black-and-white photos
here.
5. Now flip the switch to on, and your motor should spin!
FIGURE 6-20 The same circuit as in Project 6-3 on a solderless
breadboard