
Page 200 - PDA Robotics Using Your Personal Digital Assistant to Control Your Robot
P. 200
PDA 09 5/27/03 8:50 AM Page 176
PDA Robotics
To assign an ID to a control, highlight it and hit enter. Below is the
message map showing the IDs and their associated functions. When a
user clicks on a button, the associated function is called. This is all
handled by the Windows subsystem.
BEGIN_MESSAGE_MAP(CPDABotDlg, CDialog)
//{{AFX_MSG_MAP(CPDABotDlg)
ON_BN_CLICKED(IDC_CONNECT_IRDA, OnConnectIrda)
ON_BN_CLICKED(IDC_CLOSE_IRDA, OnCloseIrda)
ON_BN_CLICKED(IDC_ROBOT_FWD, OnRobotFwd)
ON_BN_CLICKED(IDC_ROBOT_LEFT, OnRobotLeft)
ON_BN_CLICKED(IDC_ROBOT_STOP, OnRobotStop)
ON_BN_CLICKED(IDC_ROBOT_RIGHT, OnRobotRight)
ON_BN_CLICKED(IDC_ROBOT_REV, OnRobotRev)
ON_BN_CLICKED(IDC_RANGE, OnRange)
ON_BN_CLICKED(IDC_AUTO, OnAuto)
ON_BN_CLICKED(IDC_MANUAL, OnManual)
ON_BN_CLICKED(IDC_WIRELESS, OnWireless)
ON_WM_TIMER()
//}}AFX_MSG_MAP
END_MESSAGE_MAP()
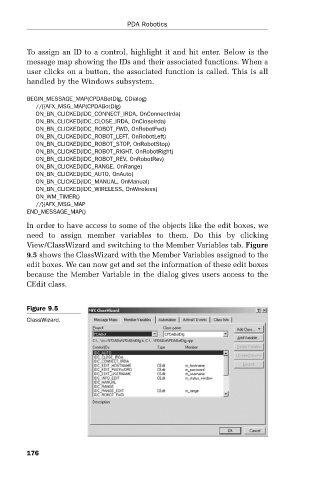
In order to have access to some of the objects like the edit boxes, we
need to assign member variables to them. Do this by clicking
View/ClassWizard and switching to the Member Variables tab. Figure
9.5 shows the ClassWizard with the Member Variables assigned to the
edit boxes. We can now get and set the information of these edit boxes
because the Member Variable in the dialog gives users access to the
CEdit class.
Figure 9.5
ClassWizard.
176