
Page 122 - Amphibionics : Build Your Own Biologically Inspired Robot
P. 122
Amphibionics 04 3/24/03 8:24 AM Page 101
Chapter 4 / Frogbotic: Build Your Own Robotic Frog
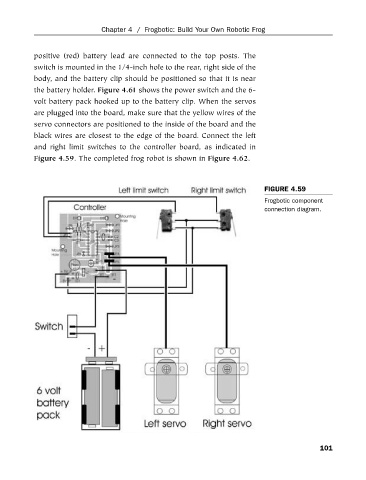
positive (red) battery lead are connected to the top posts. The
switch is mounted in the 1/4-inch hole to the rear, right side of the
body, and the battery clip should be positioned so that it is near
the battery holder. Figure 4.61 shows the power switch and the 6-
volt battery pack hooked up to the battery clip. When the servos
are plugged into the board, make sure that the yellow wires of the
servo connectors are positioned to the inside of the board and the
black wires are closest to the edge of the board. Connect the left
and right limit switches to the controller board, as indicated in
Figure 4.59. The completed frog robot is shown in Figure 4.62.
FIGURE 4.59
Frogbotic component
connection diagram.
101