
Page 260 - 02. Subyek Computer Aided Design - Beginner’s Guide to SOLIDWORKS 2019- Level 1 by Alejandro Reyes
P. 260
Beginner's Guide to SOLIDWORKS 2019- Level I
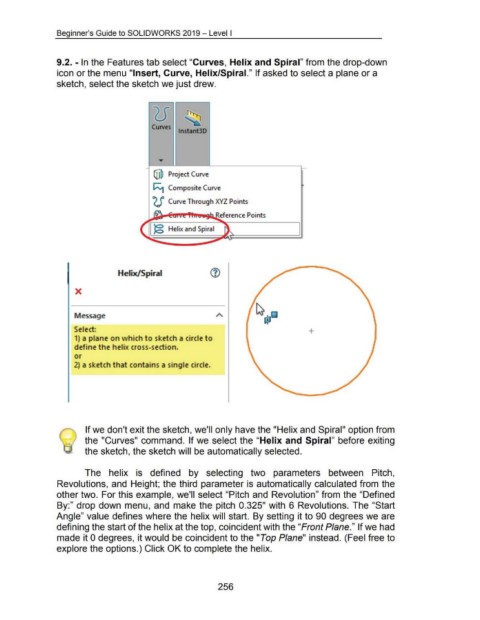
9.2. -In the Features tab select "Curves, Helix and Spiral" from the drop-down
icon or the menu "Insert, Curve, Helix/Spiral." If asked to select a plane or a
sketch, select the sketch we just drew.
Curves
lnstant3D
@ Project Curve
1 ~ Composite Curve
(.J' Curve Through XYZ Points
Reference Points
e=-----__:_:~
)g Helix and Spiral
Helix/Spiral
X
Message
Select: +
1) a plane on which to sketch a circle to
define the helix cross-section.
or
2) a sketch that contains a single circle.
If we don't exit the sketch, we'll only have the "Helix and Spiral" option from
the "Curves" command. If we select the "Helix and Spiral" before exiting
the sketch, the sketch will be automatically selected.
The helix is defined by selecting two parameters between Pitch,
Revolutions, and Height; the third parameter is automatically calculated from the
other two. For this example, we'll select "Pitch and Revolution" from the "Defined
By:" drop down menu, and make the pitch 0.325" with 6 Revolutions. The "Start
Angle" value defines where the helix will start. By setting it to 90 degrees we are
defining the start of the helix at the top, coincident with the "Front Plane." If we had
made it 0 degrees, it would be coincident to the "Top Plane" instead. (Feel free to
explore the options.) Click OK to complete the helix.
256