
Page 299 - Excel Progamming Weekend Crash Course
P. 299
r540629 ch21.qxd 9/2/03 9:35 AM Page 274
274 Sunday Morning
by the grid of dots that is displayed on the form. In other words, the corners of any control
must fall on this grid, not in between two grids. This feature is valuable because it makes it
easier for you to precisely align controls with each other and make controls the same size.
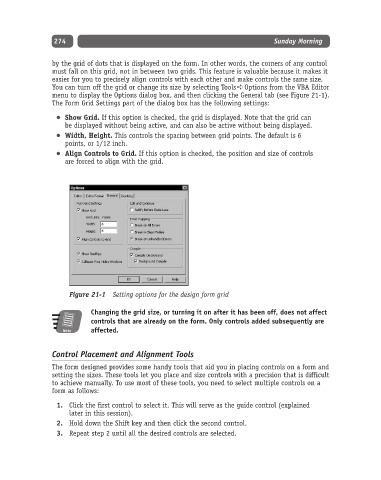
You can turn off the grid or change its size by selecting Tools ➪ Options from the VBA Editor
menu to display the Options dialog box, and then clicking the General tab (see Figure 21-1).
The Form Grid Settings part of the dialog box has the following settings:
Show Grid. If this option is checked, the grid is displayed. Note that the grid can
be displayed without being active, and can also be active without being displayed.
Width, Height. This controls the spacing between grid points. The default is 6
points, or 1/12 inch.
Align Controls to Grid. If this option is checked, the position and size of controls
are forced to align with the grid.
Figure 21-1 Setting options for the design form grid
Changing the grid size, or turning it on after it has been off, does not affect
controls that are already on the form. Only controls added subsequently are
Note affected.
Control Placement and Alignment Tools
The form designed provides some handy tools that aid you in placing controls on a form and
setting the sizes. These tools let you place and size controls with a precision that is difficult
to achieve manually. To use most of these tools, you need to select multiple controls on a
form as follows:
1. Click the first control to select it. This will serve as the guide control (explained
later in this session).
2. Hold down the Shift key and then click the second control.
3. Repeat step 2 until all the desired controls are selected.