
Page 78 - Excel Timesaving Techniques for Dummies
P. 78
14_574272 ch12.qxd 10/1/04 10:38 PM Page 63
Pause for a second after entering the data in the Putting the Wraps on the Data Entry 63
active cell and resist the natural temptation to
complete this entry by pressing the Enter key or
clicking the Enter box on the Formula bar.
The third and last step in this procedure is crit-
ical to entering the data in all the selected cells
rather than in just the active one.
3. Press Ctrl+Enter to complete the data entry,
entering it in every cell in the noncontiguous
cell selection.
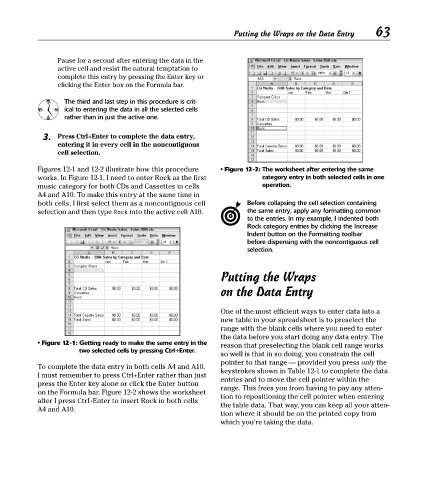
Figures 12-1 and 12-2 illustrate how this procedure • Figure 12-2: The worksheet after entering the same
works. In Figure 12-1, I need to enter Rock as the first category entry in both selected cells in one
music category for both CDs and Cassettes in cells operation.
A4 and A10. To make this entry at the same time in
both cells, I first select them as a noncontiguous cell Before collapsing the cell selection containing
selection and then type Rock into the active cell A10. the same entry, apply any formatting common
to the entries. In my example, I indented both
Rock category entries by clicking the Increase
Indent button on the Formatting toolbar
before dispensing with the noncontiguous cell
selection.
Putting the Wraps
on the Data Entry
One of the most efficient ways to enter data into a
new table in your spreadsheet is to preselect the
range with the blank cells where you need to enter
the data before you start doing any data entry. The
• Figure 12-1: Getting ready to make the same entry in the reason that preselecting the blank cell range works
two selected cells by pressing Ctrl+Enter.
so well is that in so doing, you constrain the cell
pointer to that range — provided you press only the
To complete the data entry in both cells A4 and A10,
keystrokes shown in Table 12-1 to complete the data
I must remember to press Ctrl+Enter rather than just entries and to move the cell pointer within the
press the Enter key alone or click the Enter button
range. This frees you from having to pay any atten-
on the Formula bar. Figure 12-2 shows the worksheet tion to repositioning the cell pointer when entering
after I press Ctrl+Enter to insert Rock in both cells
the table data. That way, you can keep all your atten-
A4 and A10.
tion where it should be on the printed copy from
which you’re taking the data.