
Page 96 - Excel Timesaving Techniques for Dummies
P. 96
17_574272 ch15.qxd 10/1/04 10:29 PM Page 81
81
Number Please!
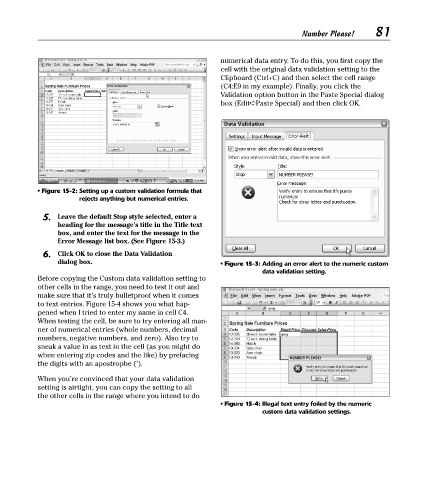
numerical data entry. To do this, you first copy the
cell with the original data validation setting to the
Clipboard (Ctrl+C) and then select the cell range
(C4:E9 in my example). Finally, you click the
Validation option button in the Paste Special dialog
box (Edit➪Paste Special) and then click OK.
• Figure 15-2: Setting up a custom validation formula that
rejects anything but numerical entries.
5. Leave the default Stop style selected, enter a
heading for the message’s title in the Title text
box, and enter the text for the message in the
Error Message list box. (See Figure 15-3.)
6. Click OK to close the Data Validation
dialog box. • Figure 15-3: Adding an error alert to the numeric custom
data validation setting.
Before copying the Custom data validation setting to
other cells in the range, you need to test it out and
make sure that it’s truly bulletproof when it comes
to text entries. Figure 15-4 shows you what hap-
pened when I tried to enter my name in cell C4.
When testing the cell, be sure to try entering all man-
ner of numerical entries (whole numbers, decimal
numbers, negative numbers, and zero). Also try to
sneak a value in as text in the cell (as you might do
when entering zip codes and the like) by prefacing
the digits with an apostrophe (’).
When you’re convinced that your data validation
setting is airtight, you can copy the setting to all
the other cells in the range where you intend to do
• Figure 15-4: Illegal text entry foiled by the numeric
custom data validation settings.