Page 391 - Failure Analysis Case Studies II
P. 391
376
           Most alloy steels suffer some degree of embrittlement in the coarse-grained region of the HAZ when
           heated at 600°C. Elements that promote such embrittlement are Cr, Cu, Mo, B, V, Nb and Ti, while
           S, and possible P and Sn, influence the brittle intergranular mode of reheat cracking. Molybdenum-
           vanadium and molybdenum-boron  steels are particularly susceptible, especially if the vanadium is
           over 0.1 %. The relative effect of the various elements has been expressed quantitatively in formulae,
           due to Nakamura (1)  and It0 (2):

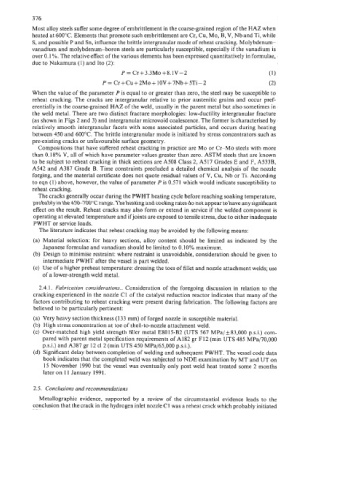
                                      P = Cr+3.3Mo+8.1V-2                           (1)
                                 P = Cr+Cu+2Mo+IOV+7Nb+5Ti-2                        (2)
           When the value of the parameter P is equal to or greater than zero, the steel may be susceptible to
           reheat  cracking. The cracks  are intergranular relative to prior  austenitic grains and  occur pref-
           erentially in the coarse-grained HAZ of the weld, usually in the parent metal but also sometimes in
           the weld metal. There are two distinct fracture morphologies: low-ductility intergranular fracture
           (as shown in Figs 2 and 3) and intergranular microvoid coalescence. The former is characterised by
           relatively smooth intergranular facets with  some associated particles, and occurs during heating
           between 450 and 600°C. The brittle intergranular mode is initiated by stress concentrators such as
           pre-existing cracks or unfavourable surface geometry.
             Compositions that have suffered reheat cracking in practice are Mo or Cr-Mo  steels with more
           than 0.18% V, all of which have parameter values greater than zero. ASTM steels that are known
           to be subject to reheat cracking in thick sections are A508 Class 2, A517 Grades E and F, A533B,
           A542 and A387 Grade B.  Time constraints precluded a detailed chemical analysis of the nozzle
           forging, and the material certificate does not quote residual values of V, Cu, Nb or Ti. According
           to eqn (1) above, however, the value of parameter P is 0.571 which would indicate susceptibility to
           reheat cracking.
             The cracks generally occur during the PWHT heating cycle before reaching soaking temperature,
           probably in the 450-700°C  range. The heating and cooling rates do not appear to have any significant
           effect on the result. Reheat cracks may also form or extend in service if the welded component is
           operating at elevated temperature and if joints are exposed to tensile stress, due to either inadequate
           PWHT or service loads.
             The literature indicates that reheat cracking may be avoided by the following means:
           (a)  Material  selection: for  heavy  sections, alloy content  should  be  limited as indicated  by  the
              Japanese formulae and vanadium should be limited to 0.10% maximum.
           (b)  Design to minimise restraint: where restraint is unavoidable, consideration should be given to
              intermediate PWHT after the vessel is part welded.
           (c)  Use of a higher preheat temperature: dressing the toes of fillet and nozzle attachment welds; use
              of a lower-strength weld metal.

             2.4.1.  Fabrication considerations.. Consideration  of the foregoing discussion in relation to the
           cracking experienced in the nozzle C1 of the catalyst reduction reactor indicates that many of the
           factors contributing to reheat cracking were present during fabrication. The following factors are
           believed to be particularly pertinent:
           (a)  Very heavy section thickness (133 mm) of forged nozzle in susceptible material.
           (b)  High stress concentration at toe of shell-to-nozzle attachment weld.
           (c)  Over-matched high yield  strength filler metal E801 5-B2 (UTS 567 MPa/+83,000  p.s.i.) com-
              pared with parent metal specification requirements of A182 gr F12 (min UTS 485 MPa/70,000
              p.s.i.) and A387 gr 12 cl 2 (min UTS 450 MPa/65,000 p.s.i.).
           (d)  Significant delay between completion of welding and subsequent PWHT. The vessel code data
              book indicates that the completed weld was subjected to NDE examination by MT and UT on
              15 November  1990 but the vessel was eventually only post weld heat treated  some 2 months
              later on 11 January 1991.

           2.5.  Conclusions and recommendations
             Metallographic  evidence,  supported  by  a  review  of  the  circumstantial  evidence leads  to the
           conclusion that the crack in the hydrogen inlet nozzle C1 was a reheat crack which probably initiated

