
Page 132 - Hacking Roomba
P. 132
Chapter 6 — Reading the Roomba Sensors 113
Optical Object Detector: Cliff and Wall Detection
The third configuration rotates the emitter and detector so they don’t directly see each other
and instead point toward something that may be there. If it is there, the LED’s light is reflected
by it and the detector sees it. This is how the Roomba’s cliff and wall sensors are implemented.
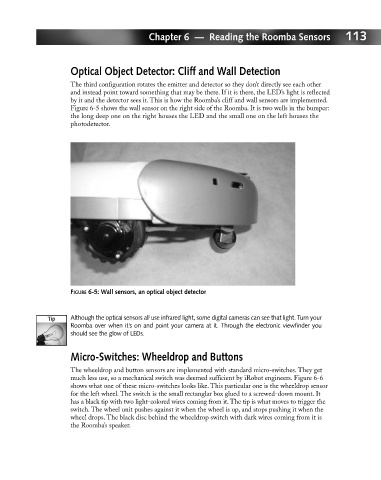
Figure 6-5 shows the wall sensor on the right side of the Roomba. It is two wells in the bumper:
the long deep one on the right houses the LED and the small one on the left houses the
photodetector.
FIGURE 6-5: Wall sensors, an optical object detector
Although the optical sensors all use infrared light, some digital cameras can see that light. Turn your
Roomba over when it’s on and point your camera at it. Through the electronic viewfinder you
should see the glow of LEDs.
Micro-Switches: Wheeldrop and Buttons
The wheeldrop and button sensors are implemented with standard micro-switches. They get
much less use, so a mechanical switch was deemed sufficient by iRobot engineers. Figure 6-6
shows what one of these micro-switches looks like. This particular one is the wheeldrop sensor
for the left wheel. The switch is the small rectanglar box glued to a screwed-down mount. It
has a black tip with two light-colored wires coming from it.The tip is what moves to trigger the
switch. The wheel unit pushes against it when the wheel is up, and stops pushing it when the
wheel drops. The black disc behind the wheeldrop switch with dark wires coming from it is
the Roomba’s speaker.