
Page 190 - Hacking Roomba
P. 190
Chapter 9 — Creating Art with Roomba 171
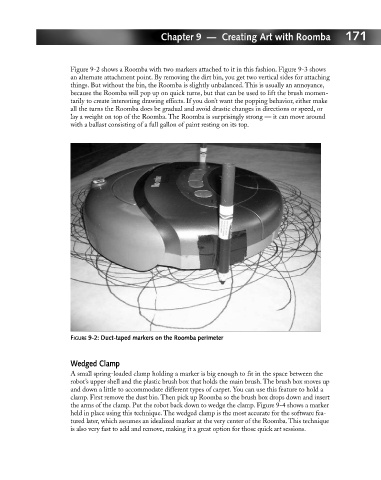
Figure 9-2 shows a Roomba with two markers attached to it in this fashion. Figure 9-3 shows
an alternate attachment point. By removing the dirt bin, you get two vertical sides for attaching
things. But without the bin, the Roomba is slightly unbalanced. This is usually an annoyance,
because the Roomba will pop up on quick turns, but that can be used to lift the brush momen-
tarily to create interesting drawing effects. If you don’t want the popping behavior, either make
all the turns the Roomba does be gradual and avoid drastic changes in directions or speed, or
lay a weight on top of the Roomba. The Roomba is surprisingly strong — it can move around
with a ballast consisting of a full gallon of paint resting on its top.
FIGURE 9-2: Duct-taped markers on the Roomba perimeter
Wedged Clamp
A small spring-loaded clamp holding a marker is big enough to fit in the space between the
robot’s upper shell and the plastic brush box that holds the main brush. The brush box moves up
and down a little to accommodate different types of carpet. You can use this feature to hold a
clamp. First remove the dust bin. Then pick up Roomba so the brush box drops down and insert
the arms of the clamp. Put the robot back down to wedge the clamp. Figure 9-4 shows a marker
held in place using this technique. The wedged clamp is the most accurate for the software fea-
tured later, which assumes an idealized marker at the very center of the Roomba. This technique
is also very fast to add and remove, making it a great option for those quick art sessions.