
Page 192 - Hacking Roomba
P. 192
Chapter 9 — Creating Art with Roomba 173
Ruler and Clamp
Both the duct tape and the wedged clamp suffer from an inherent unsteadiness. As the Roomba
moves around, the pen shifts slightly. This results in either a wobbly drawing or the pen com-
ing totally dislodged. The clamp holds the pen securely, so then the question becomes how to
attach the clamp to Roomba more securely.
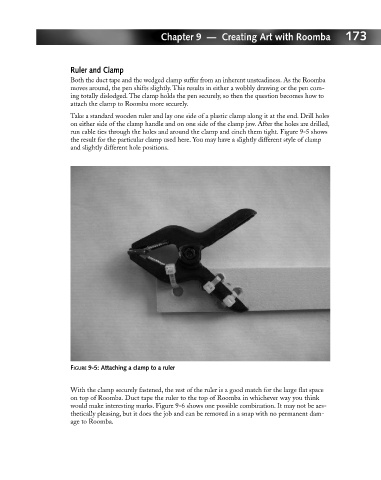
Take a standard wooden ruler and lay one side of a plastic clamp along it at the end. Drill holes
on either side of the clamp handle and on one side of the clamp jaw. After the holes are drilled,
run cable ties through the holes and around the clamp and cinch them tight. Figure 9-5 shows
the result for the particular clamp used here. You may have a slightly different style of clamp
and slightly different hole positions.
FIGURE 9-5: Attaching a clamp to a ruler
With the clamp securely fastened, the rest of the ruler is a good match for the large flat space
on top of Roomba. Duct tape the ruler to the top of Roomba in whichever way you think
would make interesting marks. Figure 9-6 shows one possible combination. It may not be aes-
thetically pleasing, but it does the job and can be removed in a snap with no permanent dam-
age to Roomba.