
Page 410 - Hacking Roomba
P. 410
Appendix A — Soldering and Safety Basics 391
3. Position the two pieces together.
4. Heat the two pieces simultaneously with the soldering iron.
The important part of that recipe is that you’re not adding more solder when making the actual
joint: The pieces should have enough solder that when heated the solder on each flows together
to form one bond.
When soldering parts to a board, this recipe is somewhat truncated because the two pieces
(board and component) are already touching. Then the application of solder must be controlled
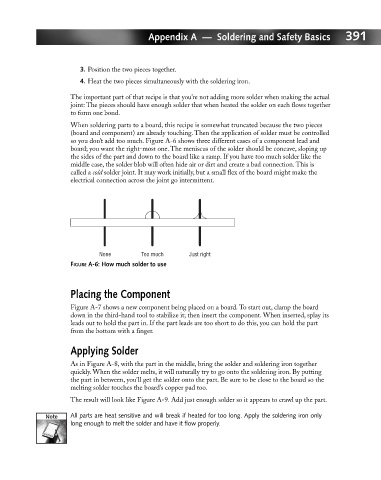
so you don’t add too much. Figure A-6 shows three different cases of a component lead and
board; you want the right-most one. The meniscus of the solder should be concave, sloping up
the sides of the part and down to the board like a ramp. If you have too much solder like the
middle case, the solder blob will often hide air or dirt and create a bad connection. This is
called a cold solder joint. It may work initially, but a small flex of the board might make the
electrical connection across the joint go intermittent.
None Too much Just right
FIGURE A-6: How much solder to use
Placing the Component
Figure A-7 shows a new component being placed on a board. To start out, clamp the board
down in the third-hand tool to stabilize it; then insert the component. When inserted, splay its
leads out to hold the part in. If the part leads are too short to do this, you can hold the part
from the bottom with a finger.
Applying Solder
As in Figure A-8, with the part in the middle, bring the solder and soldering iron together
quickly. When the solder melts, it will naturally try to go onto the soldering iron. By putting
the part in between, you’ll get the solder onto the part. Be sure to be close to the board so the
melting solder touches the board’s copper pad too.
The result will look like Figure A-9. Add just enough solder so it appears to crawl up the part.
All parts are heat sensitive and will break if heated for too long. Apply the soldering iron only
long enough to melt the solder and have it flow properly.