Page 188 - Mechanical Engineers' Handbook (Volume 2)
P. 188
9 Flow Rate   177

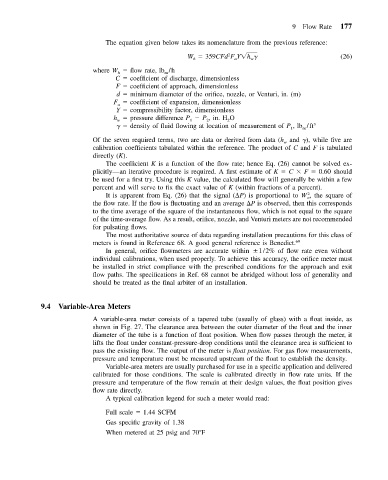
                              The equation given below takes its nomenclature from the previous reference:
                                                                2
                                                     W   359CFd F Y h
                         (26)
                                                                  a
                                                                       w
                                                       h
                           where W   flow rate, lb /h
                                  h
                                               m
                                 C   coefficient of discharge, dimensionless
                                 F   coefficient of approach, dimensionless
                                 d   minimum diameter of the orifice, nozzle, or Venturi, in. (m)
                                 F   coefficient of expansion, dimensionless
                                  a
                                 Y   compressibility factor, dimensionless
                                 h   pressure difference P   P , in. H O
                                                                2
                                                      1
                                  w
                                                          2

   density of fluid flowing at location of measurement of P ,lb /ft 3
                                                                                     m
                                                                                  1
                           Of the seven required terms, two are data or derived from data (h and
), while five are
                                                                                w
                           calibration coefficients tabulated within the reference. The product of C and F is tabulated
                           directly (K).
                              The coefficient K is a function of the flow rate; hence Eq. (26) cannot be solved ex-
                           plicitly—an iterative procedure is required. A first estimate of K   C   F   0.60 should
                           be used for a first try. Using this K value, the calculated flow will generally be within a few
                           percent and will serve to fix the exact value of K (within fractions of a percent).
                                                                                      2
                              It is apparent from Eq. (26) that the signal ( P) is proportional to W ,  the square of
                                                                                      n
                           the flow rate. If the flow is fluctuating and an average  P is observed, then this corresponds
                           to the time average of the square of the instantaneous flow, which is not equal to the square
                           of the time-average flow. As a result, orifice, nozzle, and Venturi meters are not recommended
                           for pulsating flows.
                              The most authoritative source of data regarding installation precautions for this class of
                           meters is found in Reference 68. A good general reference is Benedict. 69
                              In general, orifice flowmeters are accurate within  1/2% of flow rate even without
                           individual calibrations, when used properly. To achieve this accuracy, the orifice meter must
                           be installed in strict compliance with the prescribed conditions for the approach and exit
                           flow paths. The specifications in Ref. 68 cannot be abridged without loss of generality and
                           should be treated as the final arbiter of an installation.
            9.4  Variable-Area Meters
                           A variable-area meter consists of a tapered tube (usually of glass) with a float inside, as
                           shown in Fig. 27. The clearance area between the outer diameter of the float and the inner
                           diameter of the tube is a function of float position. When flow passes through the meter, it
                           lifts the float under constant-pressure-drop conditions until the clearance area is sufficient to
                           pass the existing flow. The output of the meter is float position. For gas flow measurements,
                           pressure and temperature must be measured upstream of the float to establish the density.
                              Variable-area meters are usually purchased for use in a specific application and delivered
                           calibrated for those conditions. The scale is calibrated directly in flow rate units. If the
                           pressure and temperature of the flow remain at their design values, the float position gives
                           flow rate directly.
                              A typical calibration legend for such a meter would read:
                              Full scale   1.44 SCFM
                              Gas specific gravity of 1.38
                              When metered at 25 psig and 70 F

