
Page 177 - PDA Robotics Using Your Personal Digital Assistant to Control Your Robot
P. 177
PDA 07 5/27/03 8:44 AM Page 153
Chapter 7 / Programming the PIC16F876 Microcontroller
0088- 3003 00af 202c 1683 1186 1283 1186 0824
0090- 3c72 1d03 2893 1683 1106 1283 1506 1683
0098- 1186 1283 1186 3003 00af 202c 0824 3c0f
00a0- 1d03 28ad 1683 1206 1283 1606 1683 1286
00a8- 1283 1686 3003 00af 202c 0824 3c66 1d03
00b0- 28bc 1683 1106 1283 1106 1683 1186 1283
00b8- 1586 3003 00af 202c 0824 3c73 1d03 28c0
00c0- 1683 1106 1283 1106 1683 1186 1283 1186
00c8- 3003 00af 202c 0824 3c78 1d03 28cf 0824
00d0- 3c64 1d03 28d6 3003 00af 202c 0824 3c6d
00d8- 1d03 28dd 3003 00af 202c 2861 0063
Program the PIC16F876
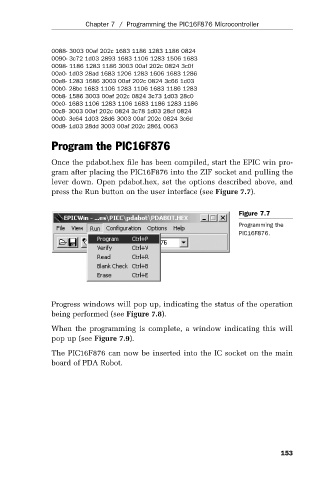
Once the pdabot.hex file has been compiled, start the EPIC win pro-
gram after placing the PIC16F876 into the ZIF socket and pulling the
lever down. Open pdabot.hex, set the options described above, and
press the Run button on the user interface (see Figure 7.7).
Figure 7.7
Programming the
PIC16F876.
Progress windows will pop up, indicating the status of the operation
being performed (see Figure 7.8).
When the programming is complete, a window indicating this will
pop up (see Figure 7.9).
The PIC16F876 can now be inserted into the IC socket on the main
board of PDA Robot.
153