Page 286 - Pipelines and Risers
P. 286
Residual Strength of Dented Pipes with Cracks                        259


        By applying a safety factory, the allowable pressure can be calculated from:
             P = P,/y                                                      (15.6)

        Safety factory can be calibrated by reliability methods as discussed in the following section.
        If no calibration is conducted, it is suggested that ~2.0.

        15.2.2 Burst Pressure of Pipes Containing Combined Dent and Longitudinal Notch
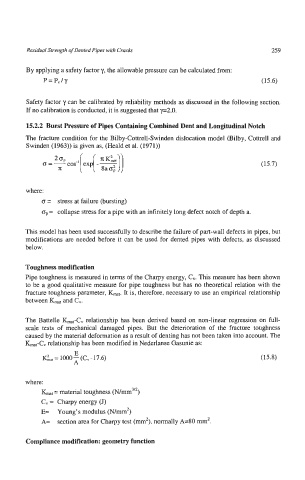
        The fracture condition for the Bilby-Cottrell-Swinden dislocation model (Bilby, Cottrell and
        Swinden (1963)) is given as, (Heald et al. (1971))

                                                                           (15.7)


        where:
             o =  stress at failure (bursting)
             o,, collapse stress for a pipe with an infinitely long defect notch of depth a.
               =
        This model has been used successfully to describe the failure of part-wall defects in pipes, but
        modifications  are needed before it can be  used for dented pipes with  defects, as discussed
        below.

        Toughness modification
        Pipe toughness is measured in terms of the Charpy energy, C,.  This measure has been  shown
        to be a good qualitative measure for pipe toughness but has no theoretical relation with the
        fracture toughness parameter, Kmt. It is, therefore, necessary to use an empirical relationship
        between K,,  and C,.


        The Battelle  Kma,-Cv relationship has been  derived based on non-linear  regression on  full-
        scale  tests  of  mechanical  damaged  pipes.  But  the  deterioration  of  the  fracture  toughness
        caused by the material deformation as a result of denting has not been taken into account. The
        K,,-C,   relationship has been modified in Nederlanse Gasunie as:
                      E
             K:at  = 1000-(C,  - 17.6)                                     (15.8)
                      A

        where:
             K,,  = material toughness (N/mm3n)
             C, = Charpy energy (J)
             E=  Young’s modulus (N/mm2)
             A=  section area for Charpy test (mm’),  normally A=80 mm’.

        Compliance modification: geometry function

