
Page 103 - Programming the Raspberry Pi Getting Started with Python
P. 103
The program is nice and simple. The loop continues forever, getting the hour and minute and
showing them in the correct places on the display by multiplying the hour by 100 to shift it into the
leftmost digits and then adding the minutes that will appear on the right.
The i2c7segment library does most of the work for us. This library is used by first setting what is to
be displayed using print_int or draw_colon and then using write_display to update what is
displayed.
The colon is made to flash by turning it on, waiting half a second, and then turning it off again.
Access to the I2C port is only available to super-users, so you need to run the command as a super-
user by entering the following:
If everything is working okay, your display should show the time.
Phase Two
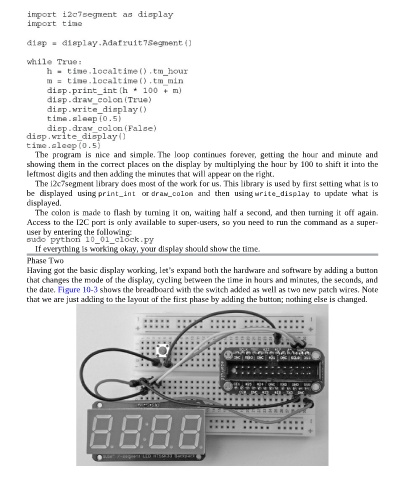
Having got the basic display working, let’s expand both the hardware and software by adding a button
that changes the mode of the display, cycling between the time in hours and minutes, the seconds, and
the date. Figure 10-3 shows the breadboard with the switch added as well as two new patch wires. Note
that we are just adding to the layout of the first phase by adding the button; nothing else is changed.