
Page 298 - Robot Builder's Bonanza
P. 298
MOUNTING DC MOTORS 267
These and other motors like them are the easiest to work with, and if you’re just starting
out in robotics, these should be the ones you choose. It’ll make your life much easier!
USING MOUNTING HOLES
Some motors have already- threaded holes on their faceplate (the side where the shaft comes
out), like that in Figure 24- 1. The threads may be imperial (inch) or metric. For imperial, 2- 56
and 4- 40 threads are the most common. For metric, you’ll often find holes tapped for 3mm
or 4mm machine screws.
If you have a die- and- tap set, you can drill your own holes or retap existing holes. To do
this you must disassemble the motor to remove the faceplate so you can drill new holes. Dis-
assembly is required to prevent metal shavings (from drilling and tapping) from getting into the
motor, which will render it inoperable.
It’s important that the machine screws you use don’t go too far into the motor, or else they may
G obstruct the rotating parts inside. If you don’t have the correct length of screw, you can either
cut it to size or add washers on the outside. Washers don’t look as good, but they’re the easier
solution.
If you’re mounting the motor perpendicular to the body of the robot, you may need to
come up with a bracket to secure the motor to. More about brackets later in this chapter.
USING BUILT- IN FLANGES
Oh, happy joy— a motor with its own mounting flanges! It doesn’t get much better than this,
so enjoy while you can. You know what you need to do here: just find some nuts and screws
that fit, mark where the holes should go on your robot, and attach.
When mounting with flanges, I like to insert the head of the screw through the flange on
the motor side (adding a flat washer if the head might come through the flange). A nut secures
everything on the other side (Figure 24- 2).
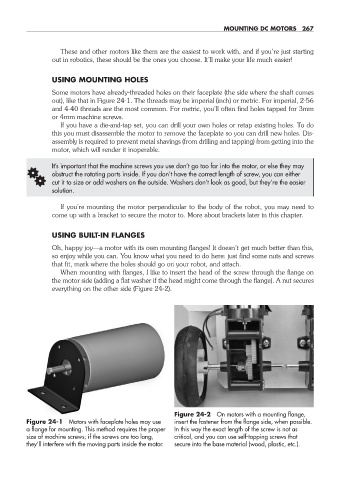
Figure 24- 2 On motors with a mounting flange,
Figure 24- 1 Motors with faceplate holes may use insert the fastener from the flange side, when possible.
a flange for mounting. This method requires the proper In this way the exact length of the screw is not as
size of machine screws; if the screws are too long, critical, and you can use self- tapping screws that
they’ll interfere with the moving parts inside the motor. secure into the base material (wood, plastic, etc.).
24-chapter-24.indd 267 4/21/11 11:51 AM