Page 149 - Sensors and Control Systems in Manufacturing
P. 149
110
                                    T w o
                           Cha p te r

                     2.11 Confocal Microscopy Sensors
                          Confocal Microscopy inspection equipment is currently used to inspect
                          probe marks, which is designed to handle high throughput, while cap-
                          turing process excursions with high probability. Once excursions are
                          detected, the data provides probe marks in the anomalous areas.
                             Efficient defect review, characterization, and root-cause analysis
                          require a flexible and interactive tool that can provide both lateral
                          and height measurements, that can revisit and fully describe features
                          in the areas of interest, and that can provide engineers and scientists
                          with timely data so they can correct the problems. The tool should
                          supply the data required for production meetings as well as images
                          that will represent the data to management and remote customers.
                          The tool should allow automated review and give engineers the
                          option of full manual control to devise an effective solution.
                          2.11.1  Confocal Profiling Characterization Systems
                          To date, conventional optical review stations and scanning-electron
                          microscopy have served this purpose, giving engineers good lateral
                          measurements and pictures of the features but providing only a rough
                          impression of their volumetric extent. Good depth measurement by
                          these methods requires skillful cross sectioning to view the deepest
                          part of the features, a process that generally delays results for long
                          periods, often for days, with works in progress at a standstill.
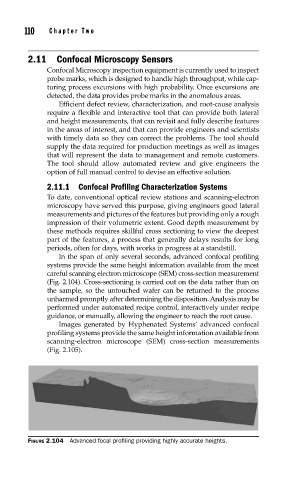
                             In the span of only several seconds, advanced confocal profiling
                          systems provide the same height information available from the most
                          careful scanning electron microscope (SEM) cross-section measurement
                          (Fig. 2.104). Cross-sectioning is carried out on the data rather than on
                          the sample, so the untouched wafer can be returned to the process
                          unharmed promptly after determining the disposition. Analysis may be
                          performed under automated recipe control, interactively under recipe
                          guidance, or manually, allowing the engineer to reach the root cause.
                             Images generated by Hyphenated Systems’ advanced confocal
                          profiling systems provide the same height information available from
                          scanning-electron microscope (SEM) cross-section measurements
                          (Fig. 2.105).


                     FIGURE 2.104  Advanced focal profi ling providing highly accurate heights.

