
Page 297 - The Creative Training Idea Book Inspired Tips and Techniques for Engaging and Effective Learning
P. 297
lucas chap 08 11/20/02 12:50 PM Page 286
286 The Creative Training Idea Book
Typically a C, S, Z, or T pattern shown in Figure 8-5 appears more dynamic and will
likely capture and hold learner attention better. Whichever pattern you choose, remem-
ber that the words or message should be the focal point, not the artistic intent. You do
not want to overshadow or diminish your written message.
Unity
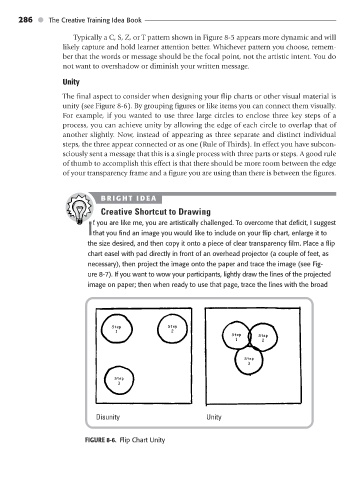
The final aspect to consider when designing your flip charts or other visual material is
unity (see Figure 8-6). By grouping figures or like items you can connect them visually.
For example, if you wanted to use three large circles to enclose three key steps of a
process, you can achieve unity by allowing the edge of each circle to overlap that of
another slightly. Now, instead of appearing as three separate and distinct individual
steps, the three appear connected or as one (Rule of Thirds). In effect you have subcon-
sciously sent a message that this is a single process with three parts or steps. A good rule
of thumb to accomplish this effect is that there should be more room between the edge
of your transparency frame and a figure you are using than there is between the figures.
BRIGHT I DEA
Creative Shortcut to Drawing
f you are like me, you are artistically challenged. To overcome that deficit, I suggest
Ithat you find an image you would like to include on your flip chart, enlarge it to
the size desired, and then copy it onto a piece of clear transparency film. Place a flip
chart easel with pad directly in front of an overhead projector (a couple of feet, as
necessary), then project the image onto the paper and trace the image (see Fig-
ure 8-7). If you want to wow your participants, lightly draw the lines of the projected
image on paper; then when ready to use that page, trace the lines with the broad
Step Step
1 2
Step Step
1 2
Step
3
Step
3
Disunity Unity
FIGURE 8-6. Flip Chart Unity