
Page 107 - Build a Remote Controlled Robot
P. 107
74
CHAPTER FIVE
again with that on the frame, bolt it in place using a 1-inch
1/4-inch-diameter bolt, nut, and lockwasher set. Do the same
with the mounting hole on the lower arm, only stack three
washers between the arm and the framework so the arm sits
straight along the framework. You can access the head of the
screw through the 3/8-inch holes drilled on the sides of the
arm. Now you can replace the upper section of the arm being
sure to align the small cutout section on the piece with the
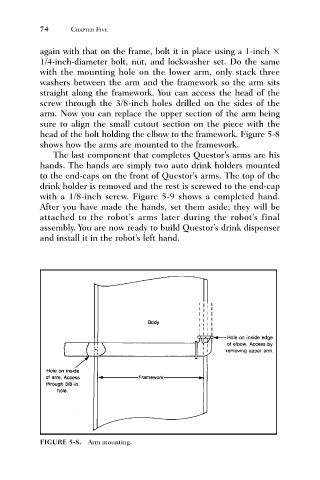
head of the bolt holding the elbow to the framework. Figure 5-8
shows how the arms are mounted to the framework.
The last component that completes Questor’s arms are his
hands. The hands are simply two auto drink holders mounted
to the end-caps on the front of Questor’s arms. The top of the
drink holder is removed and the rest is screwed to the end-cap
with a 1/8-inch screw. Figure 5-9 shows a completed hand.
After you have made the hands, set them aside; they will be
attached to the robot’s arms later during the robot’s final
assembly. You are now ready to build Questor’s drink dispenser
and install it in the robot’s left hand.
FIGURE 5-8. Arm mounting.