
Page 24 - Engineering drawing from first principles using AutoCAD
P. 24
First steps 17
Command: _line From point: '_ddosnap From point:
Click on the fillet curve, the centre point is indicated and a line will appear. The command
line will read To pain t.
The tangency point can clearly be seen at the end of the thickened line, so click the
left button again just beyond it, having ensured that your line passes through the end
of the fillet radius. Click again on the right-hand button and you can repeat the
procedure for the line through the other tangency point. Repeat for the other exam-
ples as shown.
Youmay well find that before proceeding with this part that it will be advantageous to use
the ZOOM feature for each construction to increase the size of the drawing and improved
accuracy especially as the SNAPfeature has been disabled.
I have found that in especially geometrical work it is a good habit to check accuracy with
ZOOM control. Where work progresses in steps, each dependent on the previous move, it
is not good practice to carry forward small errors of inaccuracy in input data which could
have been avoided. So if you do make errors, go back and correct them as you will
certainly have regrets later. Never forget that if you are working professionally that your
work can be easily checked by your superiors. It is also a fact that the computer can record
the day and time details when entries are made. Don't forget either to return to using the
SNAP feature when possible.
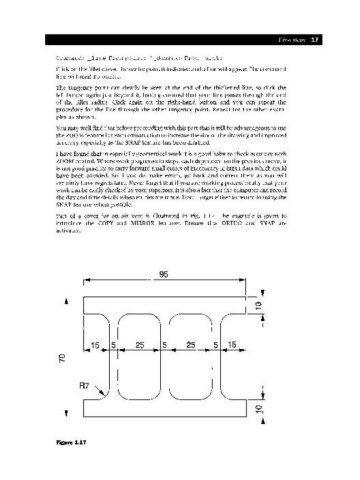
Part of a cover for an air vent is illustrated in Fig. 1.17. The example is given to
introduce the COpy and MIRROR features. Ensure that ORTHO and SNAP are
activated.
I" 95 ~I
15 5 25 5 25 5 15
R7~
Figure 1.17