
Page 124 - Enhancing CAD Drawings with Photoshop
P. 124
4386.book Page 107 Monday, November 15, 2004 3:27 PM
EXTRACTING ENTOURAGE 107
4. Zoom into the head area, and concentrate on removing the artifacts in her hair and then on her
face. Hold down the Alt key to change your cursor to the Eyedropper icon. Click a point on the
hair on her head to sample its color. Then paint with the Color Replacement tool along the edge
of her hair to replace the artifact color with the foreground color. Hold down the Alt key, sample
a facial color, and then use it to replace the color halo at the edge of her face.
5. Continue around the figure, replacing the color halos along the edge (shown in Figure 4.8)
with the corresponding colors that you sample by holding down the Alt key.
6. You can get a cleaner edge after using the Color Replacement tool, by following up with the
Defringe tool. Choose Layer Matting Defringe. Enter a width of 2 pixels in the Defringe
dialog box and click OK. Goodbye fringes!
TIP When making subtle adjustments, it is often helpful to undo and redo repeatedly (press Ctrl+Z)
to visualize the changes made in the document window.
7. Unless you are lucky, you probably still have some areas where the Extract tool didn’t produce
a perfect edge. You may be thinking that you’d like to use the Cleanup tool in the Extract dialog
box, but at this point it’s too late; the dialog is closed. Fortunately, you can get similar results
by using the Eraser in combination with the History Brush tool. Type E to select the Eraser tool.
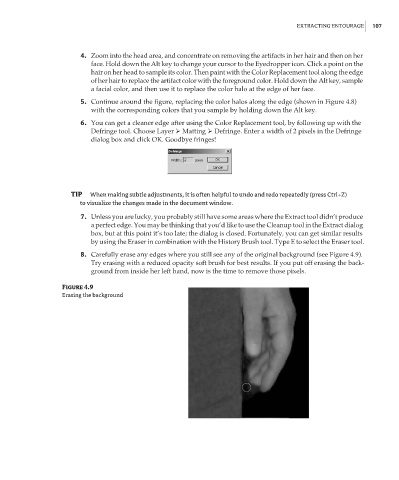
8. Carefully erase any edges where you still see any of the original background (see Figure 4.9).
Try erasing with a reduced opacity soft brush for best results. If you put off erasing the back-
ground from inside her left hand, now is the time to remove those pixels.
Figure 4.9
Erasing the background