
Page 190 - Make Your Own PCBs with EAGLE from Schematic Designs to Finished Boards
P. 190
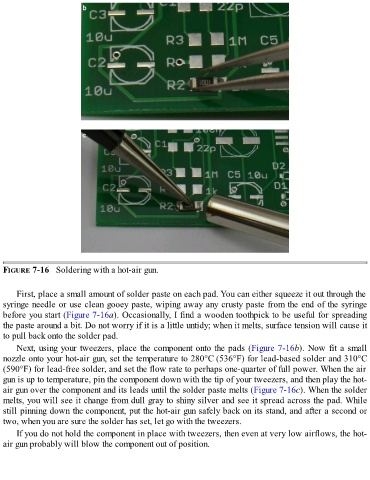
FIGURE 7-16   Soldering with a hot-air gun.


      First, place a small amount of solder paste on each pad. You can either squeeze it out through the
  syringe needle or use clean gooey paste, wiping away any crusty paste from the end of the syringe
  before you start (Figure 7-16a). Occasionally, I find a wooden toothpick to be useful for spreading
  the paste around a bit. Do not worry if it is a little untidy; when it melts, surface tension will cause it
  to pull back onto the solder pad.

      Next, using your tweezers, place the component onto the pads (Figure 7-16b). Now fit a small
  nozzle onto your hot-air gun, set the temperature to 280°C (536°F) for lead-based solder and 310°C
  (590°F) for lead-free solder, and set the flow rate to perhaps one-quarter of full power. When the air

  gun is up to temperature, pin the component down with the tip of your tweezers, and then play the hot-
  air gun over the component and its leads until the solder paste melts (Figure 7-16c). When the solder
  melts, you will see it change from dull gray to shiny silver and see it spread across the pad. While
  still pinning down the component, put the hot-air gun safely back on its stand, and after a second or
  two, when you are sure the solder has set, let go with the tweezers.

      If you do not hold the component in place with tweezers, then even at very low airflows, the hot-
  air gun probably will blow the component out of position.