
Page 109 - Programming the Raspberry Pi Getting Started with Python
P. 109
Hardware Assembly
This project is assembled from a number of different kits of parts. If you search around, you may find
already-assembled options when buying the RaspiRobotBoard and the range finder serial adapter,
which means the entire project can be built without any soldering (or, in fact, any tools more difficult
to use than a screwdriver).
Step 1: Assemble the Chassis
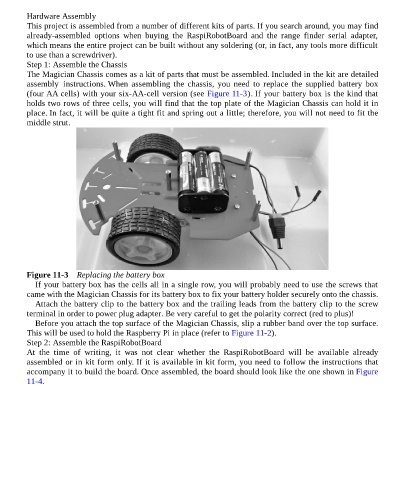
The Magician Chassis comes as a kit of parts that must be assembled. Included in the kit are detailed
assembly instructions. When assembling the chassis, you need to replace the supplied battery box
(four AA cells) with your six-AA-cell version (see Figure 11-3). If your battery box is the kind that
holds two rows of three cells, you will find that the top plate of the Magician Chassis can hold it in
place. In fact, it will be quite a tight fit and spring out a little; therefore, you will not need to fit the
middle strut.
Figure 11-3 Replacing the battery box
If your battery box has the cells all in a single row, you will probably need to use the screws that
came with the Magician Chassis for its battery box to fix your battery holder securely onto the chassis.
Attach the battery clip to the battery box and the trailing leads from the battery clip to the screw
terminal in order to power plug adapter. Be very careful to get the polarity correct (red to plus)!
Before you attach the top surface of the Magician Chassis, slip a rubber band over the top surface.
This will be used to hold the Raspberry Pi in place (refer to Figure 11-2).
Step 2: Assemble the RaspiRobotBoard
At the time of writing, it was not clear whether the RaspiRobotBoard will be available already
assembled or in kit form only. If it is available in kit form, you need to follow the instructions that
accompany it to build the board. Once assembled, the board should look like the one shown in Figure
11-4.