
Page 135 - Robot Builder's Bonanza
P. 135
104 BUILD A MOTORIZED PLASTIC PLATFORM
Fitting the Wheels
PlastoBot’s wheels are molded plastic with a removable rubber tire. The wheels are available
in a variety of sizes, and I’ve picked one of the smallest, because of the diminutive stature of
the robot. If you scale up the PlastoBot to bigger dimensions you’ll probably want to opt for
a larger wheel— the 80mm or 90mm wheels can be used for bases three and four times the
size of PlastoBot.
To fit the wheels, merely press them into place over the motor shaft. The wheels have a
D- shaped hub, matching the flatted shaft of the motors.
Once the wheels are in place, slide the motor into the bracket, adjust the position of each
motor so the wheels are the same distance from the base, and tighten the two screws until the
motor is snug.
Attaching the Ball Caster
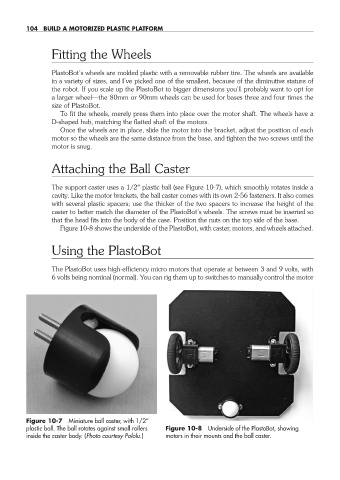
The support caster uses a 1/2″ plastic ball (see Figure 10-7), which smoothly rotates inside a
cavity. Like the motor brackets, the ball caster comes with its own 2-56 fasteners. It also comes
with several plastic spacers; use the thicker of the two spacers to increase the height of the
caster to better match the diameter of the PlastoBot’s wheels. The screws must be inserted so
that the head fits into the body of the case. Position the nuts on the top side of the base.
Figure 10-8 shows the underside of the PlastoBot, with caster, motors, and wheels attached.
Using the PlastoBot
The PlastoBot uses high- efficiency micro motors that operate at between 3 and 9 volts, with
6 volts being nominal (normal). You can rig them up to switches to manually control the motor
Figure 10-7 Miniature ball caster, with 1/2″
plastic ball. The ball rotates against small rollers Figure 10-8 Underside of the PlastoBot, showing
inside the caster body. (Photo courtesy Pololu.) motors in their mounts and the ball caster.
10-chapter-10.indd 104 4/21/11 11:45 AM