Page 220 - The Handbook for Quality Management a Complete Guide to Operational Excellence
P. 220
206   P r o c e s s   C o n t r o l                              Q u a n t i f y i n g   P r o c e s s   Va r i a t i o n    207


                                                          6 ˆ σ              6 × 0 009448
                                                                                 .
                                        C = 100 ×  engineering tolerance  = 100 ×  0 04  =  142 2%
                                                                                            .
                                          R
                                                                                 .
                                             engineering tolerance    0.04
                                                                       .
                                        C  =                     =           =  . 0 527
                                         M           8 ˆ σ         8 ×  . 0 00948
                                                                          Z      1 9 .
                                      Z    = Minimum { 1 9   }   . 1  9  =  MIN  =  = .
                                                        . , . 2 3 = 9 C
                                                                                      0 63
                                        MIN                           PK    3     3
                                   Assuming that the target is precisely 1.000, we compute:
                                                     C                 0 703
                                                                        .
                                                                                      0 692
                                          C PM  =     p      =                      = .
                                                    ( X T ) 2      (0 99832 − 1 000 ) 2
                                                                              .
                                                                     .
                                                       −
                                                 1 +            1 +
                                                       ˆ σ 2           0.000948 2
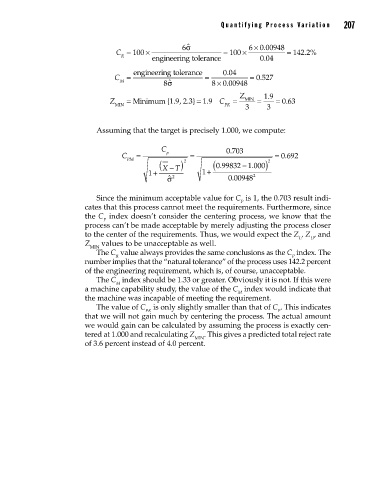
                                   Since the minimum acceptable value for C  is 1, the 0.703 result indi-
                                                                           P
                                cates that this process cannot meet the requirements. Furthermore, since
                                the C  index doesn’t consider the centering process, we know that the
                                     P
                                process can’t be made acceptable by merely adjusting the process closer
                                to the center of the requirements. Thus, we would expect the Z , Z , and
                                                                                           L
                                                                                              U
                                Z    values to be unacceptable as well.
                                 MIN
                                   The C  value always provides the same conclusions as the C  index. The
                                        R
                                                                                         P
                                number implies that the “natural tolerance” of the process uses 142.2 percent
                                of the engineering requirement, which is, of course, unacceptable.
                                   The C  index should be 1.33 or greater. Obviously it is not. If this were
                                        M
                                a machine capability study, the value of the C  index would indicate that
                                                                          M
                                the machine was incapable of meeting the requirement.
                                   The value of C  is only slightly smaller than that of C . This indicates
                                                PK
                                                                                     P
                                that we will not gain much by centering the process. The actual amount
                                we would gain can be calculated by assuming the process is exactly cen-
                                tered at 1.000 and recalculating Z MIN . This gives a predicted total reject rate
                                of 3.6 percent instead of 4.0 percent.


          09_Pyzdek_Ch09_p151-208.indd   207                                                           11/21/12   1:42 AM

