
Page 96 - 02. Subyek Computer Aided Design - Beginner’s Guide to SOLIDWORKS 2019- Level 1 by Alejandro Reyes
P. 96
Beginner's Guide to SOLIDWORKS 2019- Level I
2.50. -Now we will add more tapped holes to
[;:1 [> ~ Rib ~~ \Nrap
complete the flange's mounting holes. We'll use the [>[>
first hole as a "seed" to make copies of it using the linear
Pattern Draft ~ Intersect
"Circular Pattern" command. In the Features tab,
select the drop-down menu under the "Linear
... '19J Shell [:? SJ Mirror
Pattern" and select "Circular Pattern" or use the
menu "Insert, Pattern/Mirror, Circular Pattern."
@ Note that commands are grouped by similar
functionality. 1 ~ Curve Driven Pattern
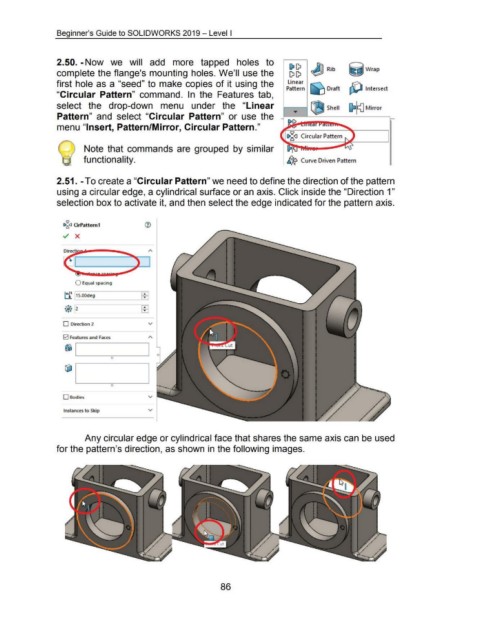
2.51. -To create a "Circular Pattern" we need to define the direction of the pattern
using a circular edge, a cylindrical surface or an axis. Click inside the "Direction 1"
selection box to activate it, and then select the edge indicated for the pattern axis.
'V'
1>~<1 OrPattern1
Directi
0 Equal spacing
tf 15.00deg ~I
---
• ...
§ •• 2 ...
••
D Direction 2 v
0 feat ures and f aces
~ L--1 ---,-----------'
0
0
D Bodies v
Instances to Skip v
Any circular edge or cylindrical face that shares the same axis can be used
for the pattern's direction, as shown in the following images.
86