
Page 74 - Build Your Own Quadcopter_ Power Up Your Designs with the Parallax Elev-8
P. 74
Chapter 3: Building the Ele v-8 53
strapping your batteries to the top of the chassis, you can trim the power harness leads to
about 4 inches. If you are going to use a custom layout to accommodate extra electronics,
decide how long to make the power harness leads. Trim the 12 AWG wires to the desired
1
length, and then strip about ⁄ 8 inch of insulation from the end of each one.
8. Locate the packet of gold bullet connectors and plastic housings in the ELEV-8 Electronics
Kit. You will need two bullet connectors and one plastic housing.
9. Solder a bullet connector onto the end of each 12 AWG lead. Insert the exposed tip of the
wire into the cup end of the bullet connector, and fill the cup with solder.
10. Insert the bullet connectors into the flattened end of the blue housing. The red lead goes
into the “D” shaped side and the black lead goes into the “O” shaped side. It will take
some force for the bullet connectors to click into place.
Pro tiP: We recommend using a flat-head screwdriver to hold the bullet connector in
the housing and then use a hammer and tap the connector into place.
11. Reposition the power harness inside the ELEV-8 chassis bottom. Secure the ESCs in place
with zip ties.
12. Connect the battery pack to the power harness. The LED tapes, if you are using them,
should now come on.
Installing the Quad Power-Distribution Board
This instruction set assumes you have chosen to purchase a quad power-distribution board
and are ready to install it. The installation is quite simple in comparison to building your
own power-distribution harness.
1. The power-distribution board should already be mounted on the bottom chassis
plate, as shown in Figure 3.26.
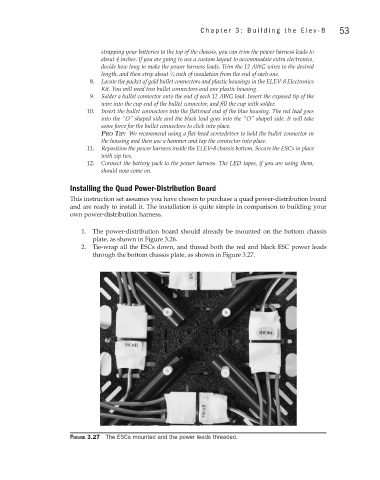
2. Tie-wrap all the ESCs down, and thread both the red and black ESC power leads
through the bottom chassis plate, as shown in Figure 3.27.
Figure 3.27 The ESCs mounted and the power leads threaded.