
Page 212 - Enhancing CAD Drawings with Photoshop
P. 212
4386.book Page 196 Monday, November 15, 2004 3:27 PM
196 CHAPTER 6 ELEVATING THE ELEVATION
TIP Switch to 50% or 100% magnification; press Ctrl++ or Ctrl+- to zoom in or out so that the image
fills your screen as much as possible. The line work looks best when the magnification is either
halved or doubled from the actual pixel size (12.5%, 25%, 50%, 100%, 200%, and so on). Interme-
diate magnifications (16.7%, 33.3%, 66.7%) suffer from partial resampling that causes some of the
line work to appear to be missing.
7. An uneven border surrounds the elevation because the rectangular building was plotted on a
square image size in AutoCAD. Automatically crop the excess border with the Trim command:
choose Image Trim to open the Trim dialog box. Click the Top Left Pixel Color radio button
and click OK.
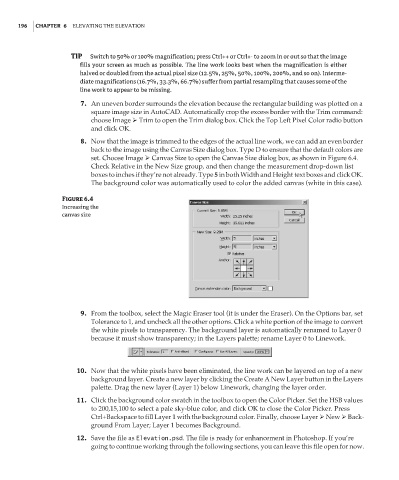
8. Now that the image is trimmed to the edges of the actual line work, we can add an even border
back to the image using the Canvas Size dialog box. Type D to ensure that the default colors are
set. Choose Image Canvas Size to open the Canvas Size dialog box, as shown in Figure 6.4.
Check Relative in the New Size group, and then change the measurement drop-down list
boxes to inches if they’re not already. Type 5 in both Width and Height text boxes and click OK.
The background color was automatically used to color the added canvas (white in this case).
Figure 6.4
Increasing the
canvas size
9. From the toolbox, select the Magic Eraser tool (it is under the Eraser). On the Options bar, set
Tolerance to 1, and uncheck all the other options. Click a white portion of the image to convert
the white pixels to transparency. The background layer is automatically renamed to Layer 0
because it must show transparency; in the Layers palette; rename Layer 0 to Linework.
10. Now that the white pixels have been eliminated, the line work can be layered on top of a new
background layer. Create a new layer by clicking the Create A New Layer button in the Layers
palette. Drag the new layer (Layer 1) below Linework, changing the layer order.
11. Click the background color swatch in the toolbox to open the Color Picker. Set the HSB values
to 200,15,100 to select a pale sky-blue color, and click OK to close the Color Picker. Press
Ctrl+Backspace to fill Layer 1 with the background color. Finally, choose Layer New Back-
ground From Layer; Layer 1 becomes Background.
12. Save the file as Elevation.psd. The file is ready for enhancement in Photoshop. If you’re
going to continue working through the following sections, you can leave this file open for now.