
Page 327 - Enhancing CAD Drawings with Photoshop
P. 327
4386.book Page 311 Monday, November 15, 2004 3:27 PM
CREATING OPTIMIZED WEB PAGES WITH IMAGEREADY 311
10. Select Slices_06 in the Web Content palette. Click the Create Rollover State button at the bot-
tom of the Web Content palette. Toggle the Kitchen Plan copy layer off in the Layers palette.
11. Now add an over rollover state for the Elevation thumbnail: Repeat steps 7 through 10 for slice 8
and the Elevation layer.
So far you have made over rollover states for each thumbnail image by toggling the appropriate
sepia-toned layers while the over state was selected in the Web Content palette. You can make
changes by applying layer style effects for a specific rollover state. Apply a stroke effect next.
12. Select slice 03. Click the Create Rollover State button at the bottom of the Web Content palette;
a new state appears called Down. The Down state appears in the web browser when the mouse
button is held down.
13. Toggle off the Site Plan copy layer in the Layers palette. Select the Site Plan layer and apply a
Stroke layer style effect. Click the Color swatch and select bright red from the Color Picker.
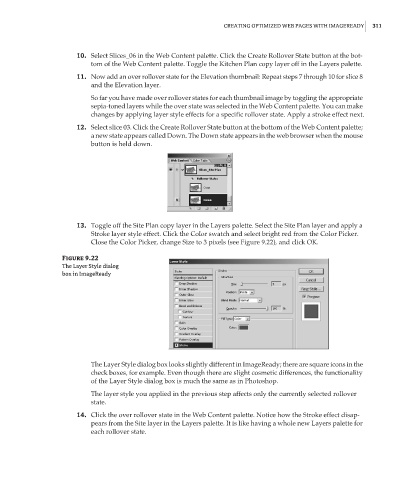
Close the Color Picker, change Size to 3 pixels (see Figure 9.22), and click OK.
Figure 9.22
The Layer Style dialog
box in ImageReady
The Layer Style dialog box looks slightly different in ImageReady; there are square icons in the
check boxes, for example. Even though there are slight cosmetic differences, the functionality
of the Layer Style dialog box is much the same as in Photoshop.
The layer style you applied in the previous step affects only the currently selected rollover
state.
14. Click the over rollover state in the Web Content palette. Notice how the Stroke effect disap-
pears from the Site layer in the Layers palette. It is like having a whole new Layers palette for
each rollover state.