
Page 224 - Excel Progamming Weekend Crash Course
P. 224
k540629 ch16.qxd 9/2/03 9:34 AM Page 199
Session 16 — Creating Custom Toolbars 199
6. Repeat as needed until the toolbar has all the desired commands on it.
7. Click the Close button to close the Customize dialog box.
Running Programs from Toolbar Buttons
So far I have described customizing toolbars with commands that are built into Excel. You
can also create custom buttons that are linked to a macro or program. The first step is to
place a custom button on a toolbar, as follows:
1. Make sure the toolbar you want to customize is visible.
2. Select View ➪ Toolbars ➪ Customize to display the Customize dialog box.
3. Click the Commands tab (see Figure 16-3).
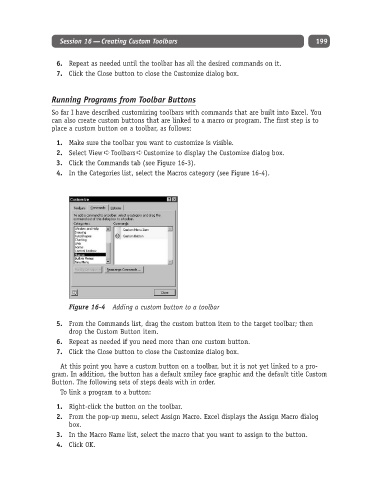
4. In the Categories list, select the Macros category (see Figure 16-4).
Figure 16-4 Adding a custom button to a toolbar
5. From the Commands list, drag the custom button item to the target toolbar; then
drop the Custom Button item.
6. Repeat as needed if you need more than one custom button.
7. Click the Close button to close the Customize dialog box.
At this point you have a custom button on a toolbar, but it is not yet linked to a pro-
gram. In addition, the button has a default smiley face graphic and the default title Custom
Button. The following sets of steps deals with in order.
To link a program to a button:
1. Right-click the button on the toolbar.
2. From the pop-up menu, select Assign Macro. Excel displays the Assign Macro dialog
box.
3. In the Macro Name list, select the macro that you want to assign to the button.
4. Click OK.