
Page 30 - Excel Timesaving Techniques for Dummies
P. 30
03_574272 ch02.qxd 10/1/04 10:23 PM Page 15
4. To delete a button from the toolbar, drag its Toolbars and Menus Made to Order 15
button from the toolbar, and then when the
box with the X in it appears at the mouse
pointer, release the mouse button.
5. To rearrange the buttons on the toolbar, drag
the button icon to its new position on the bar
(indicated by the bold I-beam-type indicator).
6. To add a vertical separator bar that groups the
buttons, locate the button in front of which the
separator will be inserted and then drag that
button slightly to the right. As soon as you
release the mouse button, the separator bar
appears.
To remove a vertical separator, drag the button
that the separator is directly in front of to the
left until the bar disappears.
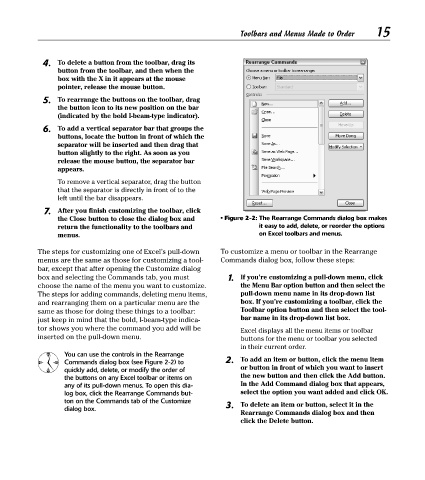
7. After you finish customizing the toolbar, click
the Close button to close the dialog box and • Figure 2-2: The Rearrange Commands dialog box makes
return the functionality to the toolbars and it easy to add, delete, or reorder the options
menus. on Excel toolbars and menus.
The steps for customizing one of Excel’s pull-down To customize a menu or toolbar in the Rearrange
menus are the same as those for customizing a tool- Commands dialog box, follow these steps:
bar, except that after opening the Customize dialog
box and selecting the Commands tab, you must 1. If you’re customizing a pull-down menu, click
choose the name of the menu you want to customize. the Menu Bar option button and then select the
The steps for adding commands, deleting menu items, pull-down menu name in its drop-down list
and rearranging them on a particular menu are the box. If you’re customizing a toolbar, click the
same as those for doing these things to a toolbar: Toolbar option button and then select the tool-
just keep in mind that the bold, I-beam-type indica- bar name in its drop-down list box.
tor shows you where the command you add will be Excel displays all the menu items or toolbar
inserted on the pull-down menu. buttons for the menu or toolbar you selected
in their current order.
You can use the controls in the Rearrange
Commands dialog box (see Figure 2-2) to 2. To add an item or button, click the menu item
quickly add, delete, or modify the order of or button in front of which you want to insert
the buttons on any Excel toolbar or items on the new button and then click the Add button.
any of its pull-down menus. To open this dia- In the Add Command dialog box that appears,
log box, click the Rearrange Commands but- select the option you want added and click OK.
ton on the Commands tab of the Customize 3. To delete an item or button, select it in the
dialog box.
Rearrange Commands dialog box and then
click the Delete button.