
Page 48 - Excel Timesaving Techniques for Dummies
P. 48
07_574272 ch06.qxd 10/1/04 10:22 PM Page 33
Doing the Drag-and-Drop Thing
Doing the Drag-and-Drop Thing Figures 6-2 and 6-3 illustrate this kind of insertion 33
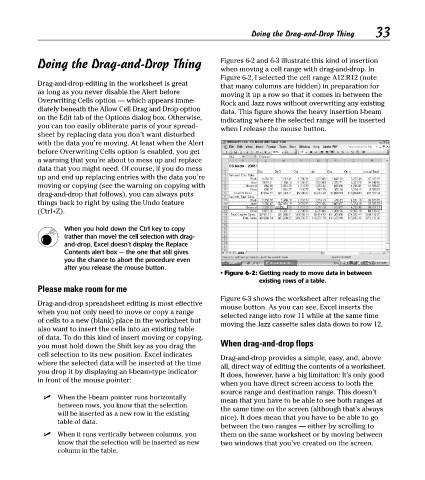
when moving a cell range with drag-and-drop. In
Figure 6-2, I selected the cell range A12:R12 (note
Drag-and-drop editing in the worksheet is great that many columns are hidden) in preparation for
as long as you never disable the Alert before
moving it up a row so that it comes in between the
Overwriting Cells option — which appears imme- Rock and Jazz rows without overwriting any existing
diately beneath the Allow Cell Drag and Drop option
data. This figure shows the heavy insertion I-beam
on the Edit tab of the Options dialog box. Otherwise, indicating where the selected range will be inserted
you can too easily obliterate parts of your spread-
when I release the mouse button.
sheet by replacing data you don’t want disturbed
with the data you’re moving. At least when the Alert
before Overwriting Cells option is enabled, you get
a warning that you’re about to mess up and replace
data that you might need. Of course, if you do mess
up and end up replacing entries with the data you’re
moving or copying (see the warning on copying with
drag-and-drop that follows), you can always puts
things back to right by using the Undo feature
(Ctrl+Z).
When you hold down the Ctrl key to copy
(rather than move) the cell selection with drag-
and-drop, Excel doesn’t display the Replace
Contents alert box — the one that still gives
you the chance to abort the procedure even
after you release the mouse button.
• Figure 6-2: Getting ready to move data in between
existing rows of a table.
Please make room for me
Figure 6-3 shows the worksheet after releasing the
Drag-and-drop spreadsheet editing is most effective mouse button. As you can see, Excel inserts the
when you not only need to move or copy a range
selected range into row 11 while at the same time
of cells to a new (blank) place in the worksheet but moving the Jazz cassette sales data down to row 12.
also want to insert the cells into an existing table
of data. To do this kind of insert moving or copying,
you must hold down the Shift key as you drag the When drag-and-drop flops
cell selection to its new position. Excel indicates Drag-and-drop provides a simple, easy, and, above
where the selected data will be inserted at the time
all, direct way of editing the contents of a worksheet.
you drop it by displaying an I-beam-type indicator It does, however, have a big limitation: It’s only good
in front of the mouse pointer:
when you have direct screen access to both the
source range and destination range. This doesn’t
When the I-beam pointer runs horizontally
mean that you have to be able to see both ranges at
between rows, you know that the selection
the same time on the screen (although that’s always
will be inserted as a new row in the existing
nice). It does mean that you have to be able to go
table of data.
between the two ranges — either by scrolling to
When it runs vertically between columns, you them on the same worksheet or by moving between
know that the selection will be inserted as new two windows that you’ve created on the screen.
column in the table.