
Page 95 - Hacking Roomba
P. 95
76 Part I — Interfacing
expensive to destroy. After getting used to performing these kinds of tests, doing them for
other projects becomes faster and basically second nature.
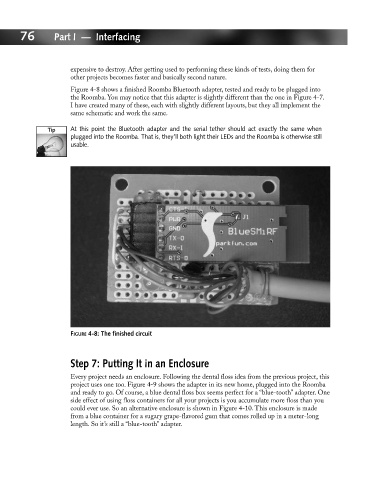
Figure 4-8 shows a finished Roomba Bluetooth adapter, tested and ready to be plugged into
the Roomba. You may notice that this adapter is slightly different than the one in Figure 4-7.
I have created many of these, each with slightly different layouts, but they all implement the
same schematic and work the same.
At this point the Bluetooth adapter and the serial tether should act exactly the same when
plugged into the Roomba. That is, they’ll both light their LEDs and the Roomba is otherwise still
usable.
FIGURE 4-8: The finished circuit
Step 7: Putting It in an Enclosure
Every project needs an enclosure. Following the dental floss idea from the previous project, this
project uses one too. Figure 4-9 shows the adapter in its new home, plugged into the Roomba
and ready to go. Of course, a blue dental floss box seems perfect for a “blue-tooth” adapter. One
side effect of using floss containers for all your projects is you accumulate more floss than you
could ever use. So an alternative enclosure is shown in Figure 4-10. This enclosure is made
from a blue container for a sugary grape-flavored gum that comes rolled up in a meter-long
length. So it’s still a “blue-tooth” adapter.