
Page 184 - Make Your Own PCBs with EAGLE from Schematic Designs to Finished Boards
P. 184
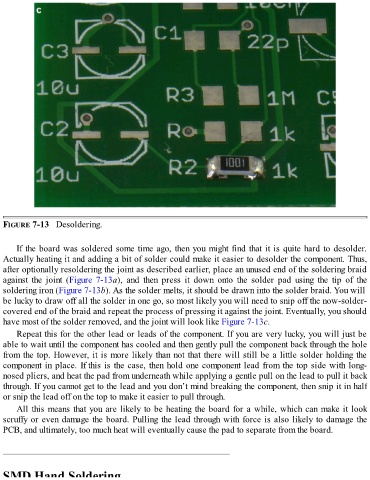
FIGURE 7-13   Desoldering.


      If the board was soldered some time ago, then you might find that it is quite hard to desolder.

  Actually heating it and adding a bit of solder could make it easier to desolder the component. Thus,
  after optionally resoldering the joint as described earlier, place an unused end of the soldering braid
  against  the  joint  (Figure 7-13a),  and  then  press  it  down  onto  the  solder  pad  using  the  tip  of  the
  soldering iron (Figure 7-13b). As the solder melts, it should be drawn into the solder braid. You will
  be lucky to draw off all the solder in one go, so most likely you will need to snip off the now-solder-

  covered end of the braid and repeat the process of pressing it against the joint. Eventually, you should
  have most of the solder removed, and the joint will look like Figure 7-13c.
      Repeat this for the other lead or leads of the component. If you are very lucky, you will just be
  able to wait until the component has cooled and then gently pull the component back through the hole
  from the top. However, it is more likely than not that there will still be a little solder holding the

  component in place. If this is the case, then hold one component lead from the top side with long-
  nosed pliers, and heat the pad from underneath while applying a gentle pull on the lead to pull it back
  through. If you cannot get to the lead and you don’t mind breaking the component, then snip it in half
  or snip the lead off on the top to make it easier to pull through.

      All this means that you are likely to be heating the board for a while, which can make it look
  scruffy or even damage the board. Pulling the lead through with force is also likely to damage the
  PCB, and ultimately, too much heat will eventually cause the pad to separate from the board.


  SMD Hand Soldering