
Page 181 - Make Your Own PCBs with EAGLE from Schematic Designs to Finished Boards
P. 181
Soldering Through-Hole PCBs
Having explored the various tools we will need, let’s start by learning how to solder through-hole
PCBs. It is a good idea to try to follow these instructions on a PCB. You may wish to order one of the
PCB designs from earlier in this book. We will use the sound meter design. Having a batch of PCBs
means that you can sacrifice one or two on which to practice your soldering.
Through-Hole Soldering Step by Step
The first thing to do is to turn on your soldering iron and set the temperature. You will find conflicting
advice for temperatures to use, but I set my soldering iron to 280°C (536°F) for lead-based solder
and to 310°C (590°F) for lead-free solder. Once you get your eye in with soldering, you probably
will want to work at a higher temperature, where the solder melts a bit more quickly. The higher
temperature will not damage the components as long as you are quick.
When the soldering iron is up to temperature, clean it on the damp sponge or brass tip cleaner.
Once cleaned, it should look bright and silvery.
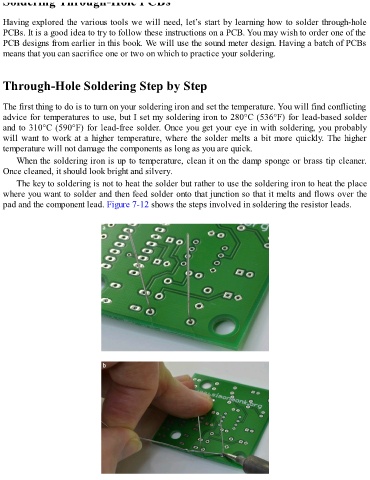
The key to soldering is not to heat the solder but rather to use the soldering iron to heat the place
where you want to solder and then feed solder onto that junction so that it melts and flows over the
pad and the component lead. Figure 7-12 shows the steps involved in soldering the resistor leads.