
Page 23 - Make Your Own PCBs with EAGLE from Schematic Designs to Finished Boards
P. 23
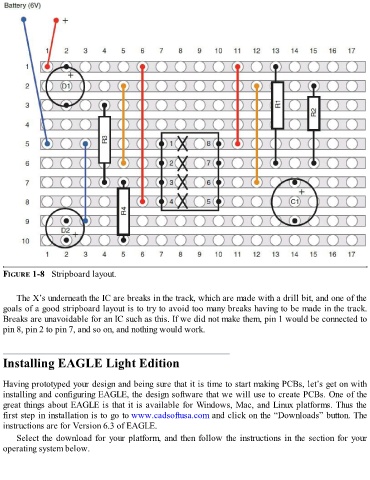
FIGURE 1-8   Stripboard layout.


      The X’s underneath the IC are breaks in the track, which are made with a drill bit, and one of the
  goals of a good stripboard layout is to try to avoid too many breaks having to be made in the track.
  Breaks are unavoidable for an IC such as this. If we did not make them, pin 1 would be connected to
  pin 8, pin 2 to pin 7, and so on, and nothing would work.


  Installing EAGLE Light Edition


  Having prototyped your design and being sure that it is time to start making PCBs, let’s get on with

  installing and configuring EAGLE, the design software that we will use to create PCBs. One of the
  great things about EAGLE is that it is available for Windows, Mac, and Linux platforms. Thus the
  first step in installation is to go to www.cadsoftusa.com and click on the “Downloads” button. The
  instructions are for Version 6.3 of EAGLE.

      Select the download for your platform, and then follow the instructions in the section for your
  operating system below.