
Page 95 - Programming the Raspberry Pi Getting Started with Python
P. 95
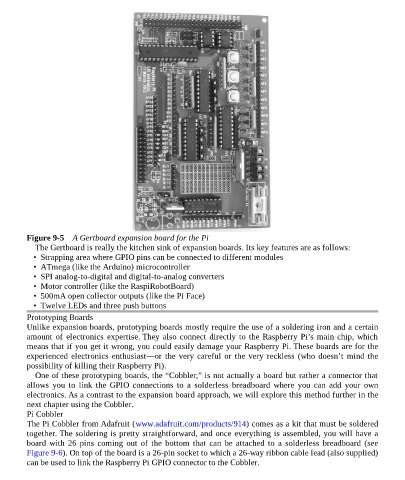
Figure 9-5    A Gertboard expansion board for the Pi
             The Gertboard is really the kitchen sink of expansion boards. Its key features are as follows:
             •  Strapping area where GPIO pins can be connected to different modules
             •  ATmega (like the Arduino) microcontroller
             •  SPI analog-to-digital and digital-to-analog converters

             •  Motor controller (like the RaspiRobotBoard)
             •  500mA open collector outputs (like the Pi Face)
             •  Twelve LEDs and three push buttons
          Prototyping Boards
          Unlike expansion boards, prototyping boards mostly require the use of a soldering iron and a certain
          amount  of  electronics  expertise. They also connect directly to the Raspberry Pi’s main chip, which

          means that if you get it wrong, you could easily damage your Raspberry Pi. These boards are for the
          experienced electronics enthusiast—or the very careful or the very reckless (who doesn’t mind the
          possibility of killing their Raspberry Pi).
             One of these prototyping boards, the “Cobbler,” is not actually a board but rather a connector that
          allows  you  to  link  the  GPIO  connections  to  a  solderless  breadboard  where  you  can  add  your  own
          electronics. As a contrast to the expansion board approach, we will explore this method further in the
          next chapter using the Cobbler.
          Pi Cobbler
          The Pi Cobbler from Adafruit (www.adafruit.com/products/914) comes as a kit that must be soldered
          together. The soldering is pretty straightforward, and once everything is assembled, you will have a
          board  with  26  pins  coming  out  of  the  bottom  that  can  be  attached  to  a  solderless  breadboard  (see
          Figure 9-6). On top of the board is a 26-pin socket to which a 26-way ribbon cable lead (also supplied)
          can be used to link the Raspberry Pi GPIO connector to the Cobbler.