
Page 100 - 15 Dangerously Mad Projects for the Evil Genius
P. 100
Chapter 7 ■ Laser-Grid Intruder Alarm 79
Testing To do this, we are going to have the laser turned
on and then place the mirrors rather than try to fix
Before we screw down the box lid, we should try a the mirrors in place first.
simple test to make sure that everything is
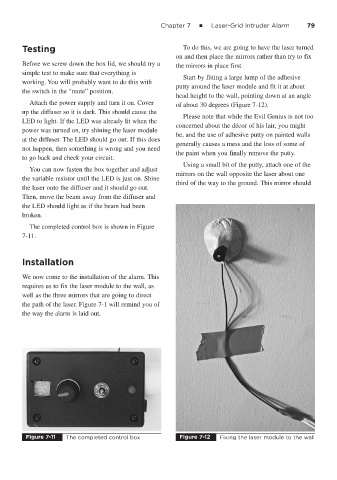
Start by fitting a large lump of the adhesive
working. You will probably want to do this with
putty around the laser module and fit it at about
the switch in the “mute” position.
head height to the wall, pointing down at an angle
Attach the power supply and turn it on. Cover of about 30 degrees (Figure 7-12).
up the diffuser so it is dark. This should cause the
Please note that while the Evil Genius is not too
LED to light. If the LED was already lit when the
concerned about the décor of his lair, you might
power was turned on, try shining the laser module
be, and the use of adhesive putty on painted walls
at the diffuser. The LED should go out. If this does
generally causes a mess and the loss of some of
not happen, then something is wrong and you need
the paint when you finally remove the putty.
to go back and check your circuit.
Using a small bit of the putty, attach one of the
You can now fasten the box together and adjust
mirrors on the wall opposite the laser about one
the variable resistor until the LED is just on. Shine
third of the way to the ground. This mirror should
the laser onto the diffuser and it should go out.
Then, move the beam away from the diffuser and
the LED should light as if the beam had been
broken.
The completed control box is shown in Figure
7-11.
Installation
We now come to the installation of the alarm. This
requires us to fix the laser module to the wall, as
well as the three mirrors that are going to direct
the path of the laser. Figure 7-1 will remind you of
the way the alarm is laid out.
Figure 7-11 The completed control box Figure 7-12 Fixing the laser module to the wall