
Page 123 - 15 Dangerously Mad Projects for the Evil Genius
P. 123
102 15 Dangerously Mad Projects for the Evil Genius
should begin to flash. Now turn on the motor and
slowly increase the speed. If things start to feel
unstable, turn everything off and try balancing the
arm better or use a different means of connecting
the arm to the spindle. Be careful at this stage,
because the vibrations may loosen the arm, causing
it to fly off and potentially break or hurt someone.
You will start to pick out some fast-moving
letters. Concentrate on one of the letters and adjust
the speed of the motor until the letters stands still.
You should then be able to set the letters to appear
to progress around the cylinder of light by
adjusting the speed slightly.
Changing the Message
In the “Theory” section later in this chapter, we
explain just how the software works, but for now
you are probably wondering how to change the
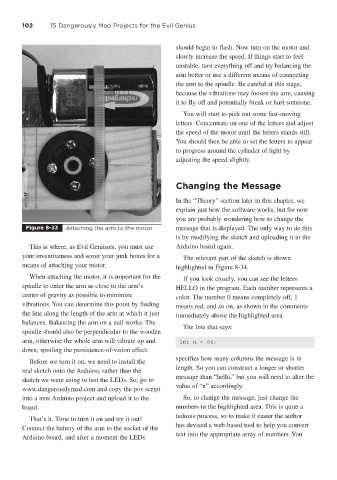
Figure 8-33 Attaching the arm to the motor message that is displayed. The only way to do this
is by modifying the sketch and uploading it to the
This is where, as Evil Geniuses, you must use Arduino board again.
your inventiveness and scour your junk boxes for a The relevant part of the sketch is shown
means of attaching your motor. highlighted in Figure 8-34.
When attaching the motor, it is important for the If you look closely, you can see the letters
spindle to enter the arm as close to the arm’s HELLO in the program. Each number represents a
center of gravity as possible to minimize color. The number 0 means completely off, 1
vibrations. You can determine this point by finding means red, and so on, as shown in the comments
the line along the length of the arm at which it just immediately above the highlighted area.
balances. Balancing the arm on a nail works. The
The line that says:
spindle should also be perpendicular to the wooden
arm, otherwise the whole arm will vibrate up and int n = 64;
down, spoiling the persistence-of-vision effect.
specifies how many columns the message is in
Before we turn it on, we need to install the
length. So you can construct a longer or shorter
real sketch onto the Arduino, rather than the
message than “hello,” but you will need to alter the
sketch we were using to test the LEDs. So, go to
value of “n” accordingly.
www.dangerouslymad.com and copy the pov script
into a new Arduino project and upload it to the So, to change the message, just change the
board. numbers in the highlighted area. This is quite a
tedious process, so to make it easier the author
That’s it. Time to turn it on and try it out!
has devised a web-based tool to help you convert
Connect the battery of the arm to the socket of the
text into the appropriate array of numbers. You
Arduino board, and after a moment the LEDs