
Page 494 - 02. Subyek Computer Aided Design - Beginner’s Guide to SOLIDWORKS 2019- Level 1 by Alejandro Reyes
P. 494
Beginner's Guide to SOLIDWORKS 2019- Level I
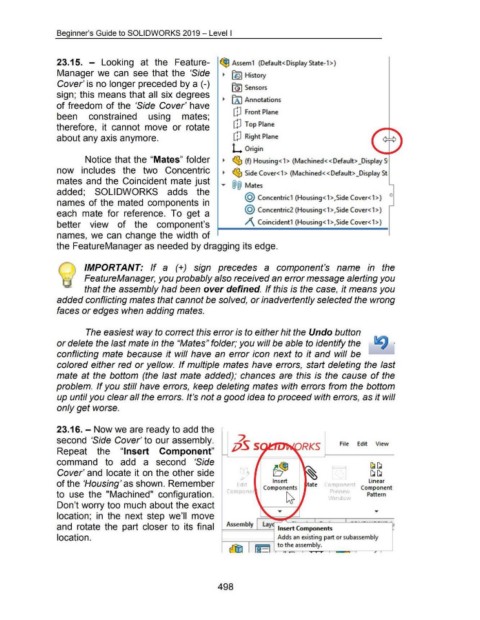
23.15. - Looking at the Feature- I ~ Ass em 1 (Default< Display State-1 >)
Manager we can see that the 'Side ~ ~ History
Cover' is no longer preceded by a (-)
[GI Sensors
sign; this means that all six degrees
~ [A I Annotations
of freedom of the 'Side Cover' have
(!J Front Plane
been constrained using mates;
therefore, it cannot move or rotate [~I Top Plane
about any axis anymore. [!J Right Plane r A ~
<. .)
L Origin \..... .../
Notice that the "Mates" folder ~ ~ (f) Housing < 1 > (Machined<< Default> _DisplayS·
now includes the two Concentric ~ ~ Side Cover< 1 > (Machined<< Default> _Display St
mates and the Coincident mate just
,.. @@ Mates -
added; SOLIDWORKS adds the
@ Concentric1 (Housing< 1 >,Side Cover< 1 >) 0
names of the mated components in
@ Concentric2 (Housing<1>,Side Cover<1>) -
each mate for reference. To get a
better view of the component's /\ Coincident1 (Housing< 1 >,Side Cover< 1 >)
names, we can change the width of
the FeatureManager as needed by dragging its edge.
@ IMPORTANT: If a (+) sign precedes a component's name in the
FeatureManager, you probably also received an error message alerting you
that the assembly had been over defined. If this is the case, it means you
added conflicting mates that cannot be solved, or inadvertently selected the wrong
faces or edges when adding mates.
The easiest way to correct this error is to either hit the Undo button
or delete the last mate in the "Mates" folder; you will be able to identify the
conflicting mate because it will have an error icon next to it and will be
colored either red or yellow. If multiple mates have errors, start deleting the last
mate at the bottom (the last mate added); chances are this is the cause of the
problem. If you still have errors, keep deleting mates with errors from the bottom
up until you clear all the errors. It's not a good idea to proceed with errors, as it will
only get worse.
23.16. - Now we are ready to add the
second 'Side Cover' to our assembly.
File Edit View
Repeat the "Insert Component"
command to add a second 'Side
~~
Cover' and locate it on the other side ~~
of the 'Housing' as shown. Remember Ed1t Insert Componen linear
Componer Components Pre 1e Component
to use the "Machined" configuration. ~ mdo Pattern
Don't worry too much about the exact
location; in the next step we'll move
and rotate the part closer to its final
location.
498